3. Building the Mold and Preparing the Wood
Advertisements
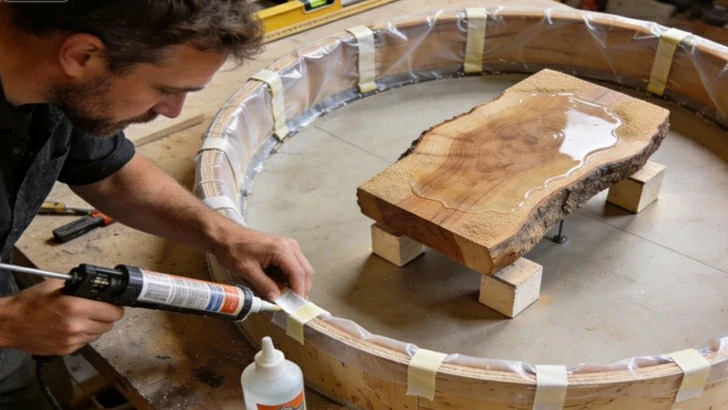
A leak-proof mold and perfectly sealed wood are critical to prevent a disastrous, messy epoxy leak.
1. Creating the Round Mold
Construct a round form slightly larger than your intended table diameter using a flexible, non-porous material. A common method is to use a strip of flexible plastic or sealed plywood bent into a circle. Seal all interior seams with silicone caulk and tape to ensure it is absolutely watertight. The mold must be placed on a perfectly level surface.
2. Sealing and Positioning the Wood
The wood must be sealed with a thin coat of clear epoxy or a specific sanding sealer on all surfaces that will contact the liquid epoxy. This prevents air bubbles from escaping the wood and becoming trapped in your pour. Once sealed, suspend the wood slab in the center of the mold using small blocks or by attaching temporary legs, ensuring it is level and stable.
3. Final Pre-Pour Checks
Double-check the level of your workspace and the mold. Ensure the room temperature is stable (typically 21-24°C or 70-75°F as per epoxy instructions) and humidity is low. Clean the mold's interior with isopropyl alcohol to remove any dust.
Advertisements
Advertisements
You May Have Missed
How long are your pinky and ring fingers? Finger longth reveal your personality

40 Breathtakingly Perfect Time-Lapse Photos