4. Specialty Organizers for Common Problem Areas
Advertisements
Certain items consistently cause clutter. Targeted organizers can corral these problem children and bring instant order to specific categories.
1. Can and Jar Organizers
Instead of a precarious stack of cans, use a can rack organizer. These racks typically store cans in a rolling or cascading fashion, so the oldest can rolls to the front for first use (a FIFO system - First In, First Out). For jars of sauce, salsa, or baby food, a stepped organizer keeps them neatly in rows.
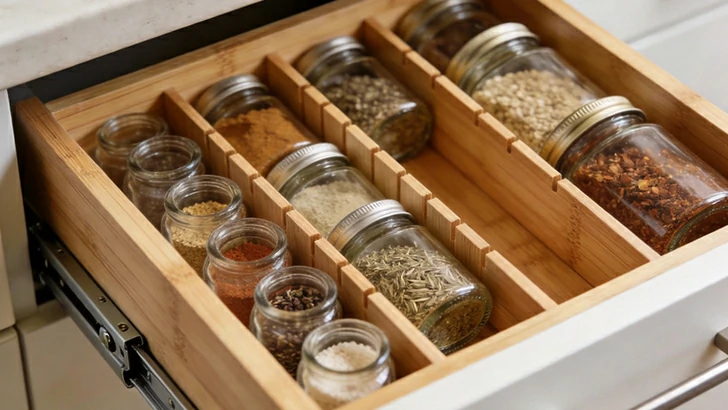
2. Spice Storage Solutions
A jumbled spice collection is a common headache. Solutions include: a pull-out spice rack attached to the door or shelf, a drawer insert with adjustable dividers, or a tiered turntable (Lazy Susan) on a shelf. Transferring spices to uniform jars also contributes significantly to order.
3. Bag and Wrap Dispensers
Plastic bags, aluminum foil, parchment paper, and cling wrap boxes always seem to fall over. A vertical dispenser, either wall-mounted or standing in a bin, holds these boxes neatly and allows you to pull sheets from the top. Some models are designed to hold multiple types at once.

5. Creating Kid-Friendly and High-Use Zones
A pantry should work for every member of the household. Designing areas specifically for children and for daily meal prep increases independence and efficiency.
1. The Accessible Snack Station
Dedicate a low shelf or a large, easy-to-open bin to after-school snacks and lunchbox items. Use clear containers with easy-to-remove lids or open bins so children can see and reach their options without pulling everything else apart. Label with both words and pictures for younger kids.
2. The Breakfast Corner
Group all breakfast items together: cereals (in containers), oatmeal packets, pancake mix, coffee, and tea. If space allows, keep bowls and mugs nearby. This turns morning chaos into a streamlined process where everything needed is in one dedicated zone.
3. The Dinner Prep "Grab Box"
For common dinner ingredients like pasta, rice, canned beans, and canned tomatoes, consider a large basket or bin. When it's time to cook, you can pull out the entire "dinner bin" instead of fetching items one by one, saving time and steps.
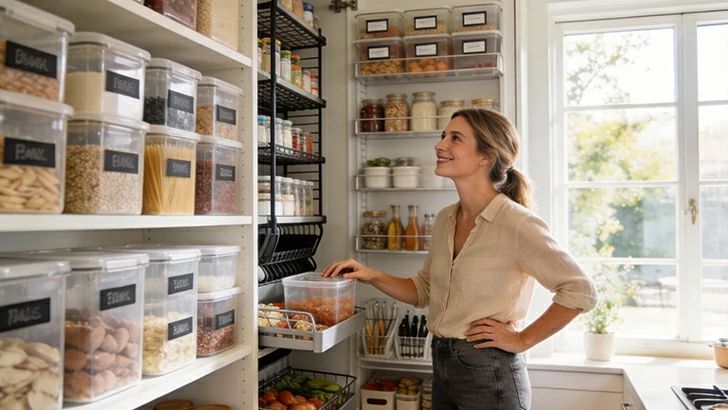
6. Maintaining the System Long-Term
Organization is not a one-time project but an ongoing practice. Simple habits will ensure your beautifully organized pantry doesn't revert to chaos in a few weeks.
1. The One-In, One-Out Rule
Adopt a simple policy: when you buy a new box of crackers, the old container must be empty or discarded. This prevents over-accumulation and ensures your containers and space limits are respected.
2. Regular Mini-Audits
Once a month, do a quick 5-minute scan of your pantry. Tidy any disarray, check for items getting low (to add to your shopping list), and ensure labels are still accurate. This prevents small messes from becoming overwhelming.
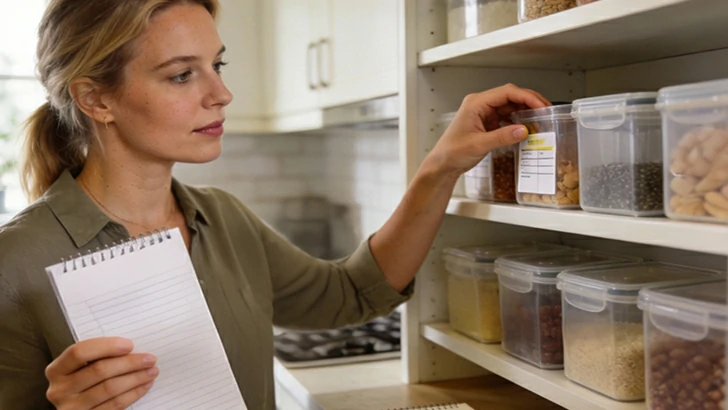
3. Shopping with a List and a Photo
Before grocery shopping, check your pantry and create a list based on your meal plan. Some people find it helpful to keep a photo of their organized pantry on their phone to quickly check if they already have an item while at the store, preventing duplicates.
Conclusion
Revolutionizing your pantry cabinet through creative organization is an investment that pays daily dividends in saved time, reduced stress, and less food waste. By starting with a thorough audit, implementing the transformative power of uniform containers and labels, maximizing every inch of vertical space, employing specialty organizers, and designing the layout for your household's actual needs, you can create a system that is both highly functional and visually satisfying. Remember, the most effective system is the one you can easily maintain. With these hacks and a commitment to simple upkeep habits, you can enjoy a perpetually orderly and inspiring pantry that makes cooking and living in your kitchen a genuine pleasure.
Advertisements
Advertisements
You May Have Missed

Funny wedding photos make people feel sorry for the bride and groom

Funniest Sports Mistakes from the Past