🍋 Beyond Lemon: Creative Scent and Function Combinations
Advertisements
The citrus component and essential oils can be swapped to create polishes that suit your sensory preferences and functional needs.
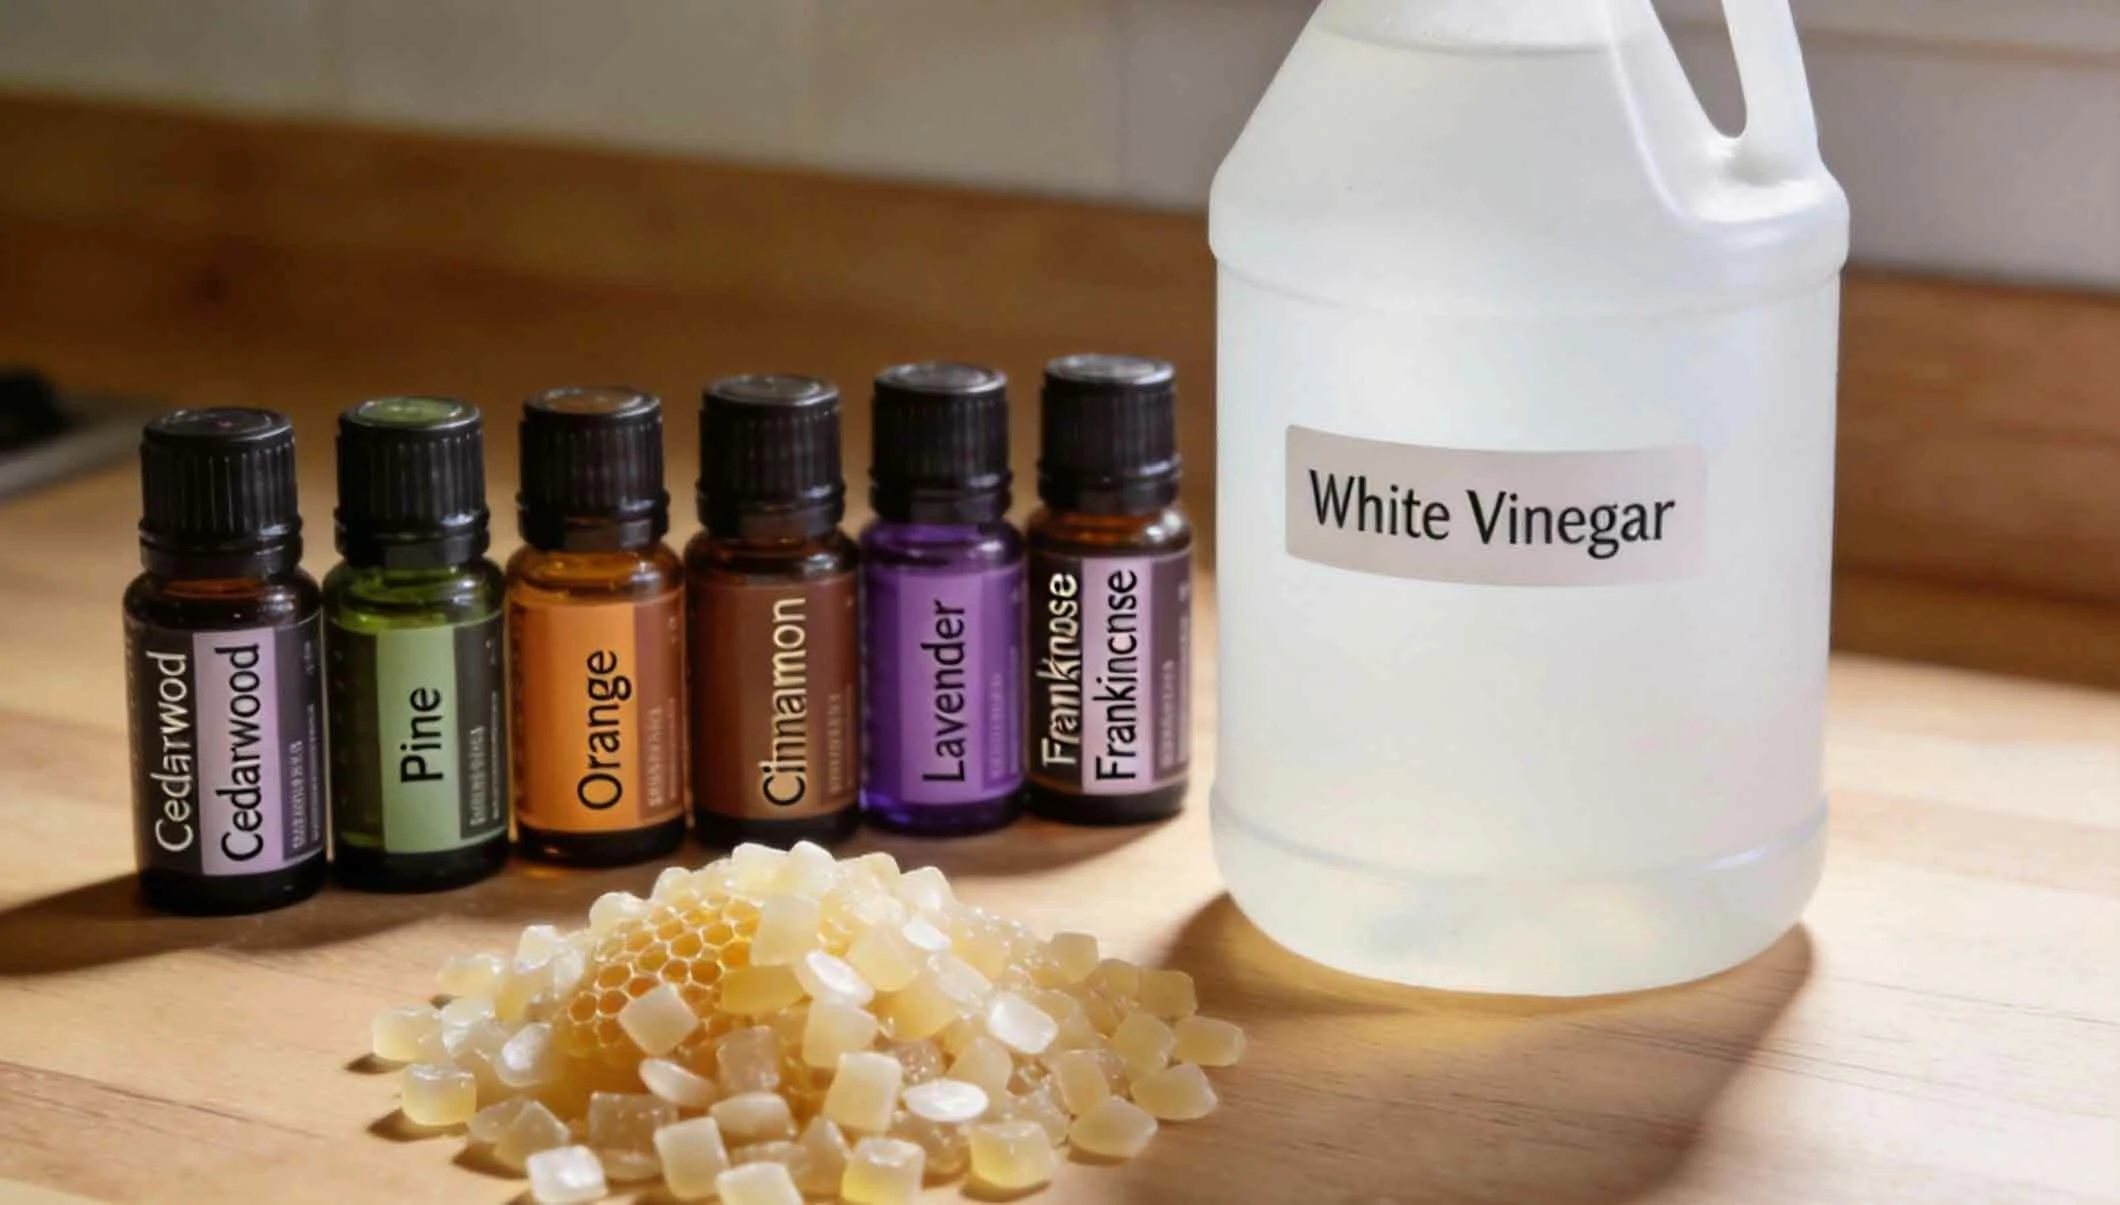
1. The White Vinegar Base
Substituting lemon juice with white vinegar creates a polish with stronger cleaning power for heavily soiled pieces. The vinegar smell dissipates quickly, leaving behind only the scent of your essential oils.
2. Essential Oil Blends for Ambiance
•Woodland Fresh: 10 drops Cedarwood + 10 drops Pine.•Warm & Spicy: 15 drops Orange + 5 drops Cinnamon.•Calming & Clean: 12 drops Lavender + 8 drops Frankincense.
3. Adding Beeswax for Extra Protection
For surfaces that need more durability, like dining tables, you can create a conditioning wax. Gently melt 1/4 cup of beeswax pellets into 1 cup of your chosen oil using a double boiler. Let it cool slightly, add your acid and essential oils, then whip as it solidifies for a creamy, spreadable paste.
🧽 The Correct Application Technique
Applying your DIY polish correctly is just as important as making it. Proper technique ensures an even, beautiful result without buildup.
1. Preparation is Key
Start with a clean, dry surface. Use a soft, microfiber cloth dampened with water to remove dust. For sticky spots, dip the cloth in your polish mix (without extra oil) to spot-clean.
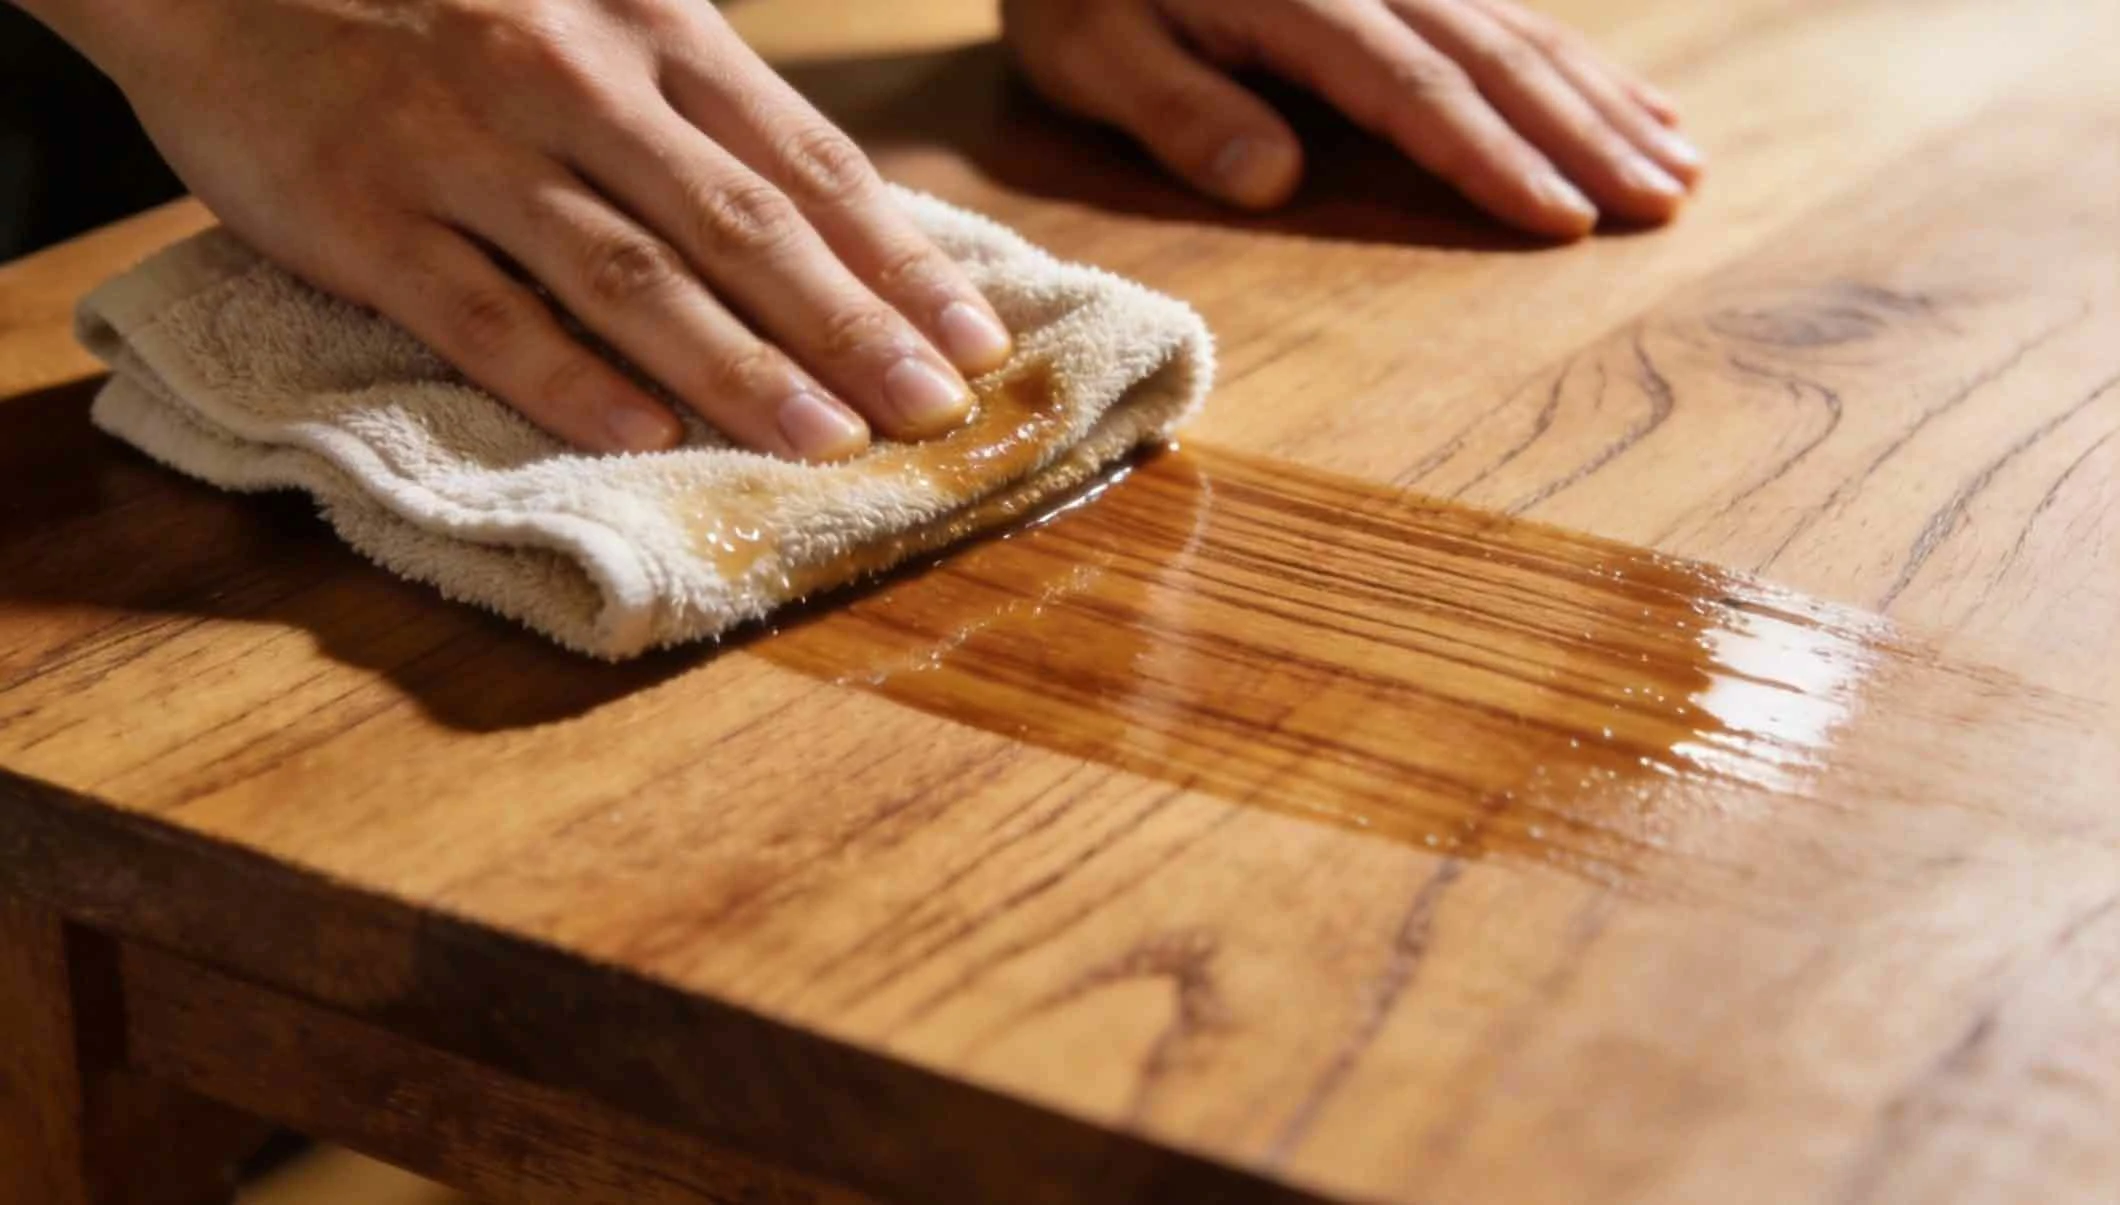
2. The ""Less is More"" Method
1. Shake your polish jar well.2. Apply a small amount of polish to a clean, soft cloth (like an old t-shirt or flannel).3. Wipe onto the wood following the direction of the grain.4. Allow it to sit and penetrate for 5-10 minutes.
3. Buffing to a Perfect Shine
After letting it sit, take a second clean, dry microfiber cloth and buff the surface vigorously, again with the grain. This removes any excess oil, prevents a sticky film, and brings up a warm, satin glow.
Advertisements
⚗️ Storage, Shelf Life, and Safety
Because these polishes use fresh, natural ingredients, proper storage is essential for safety and effectiveness.
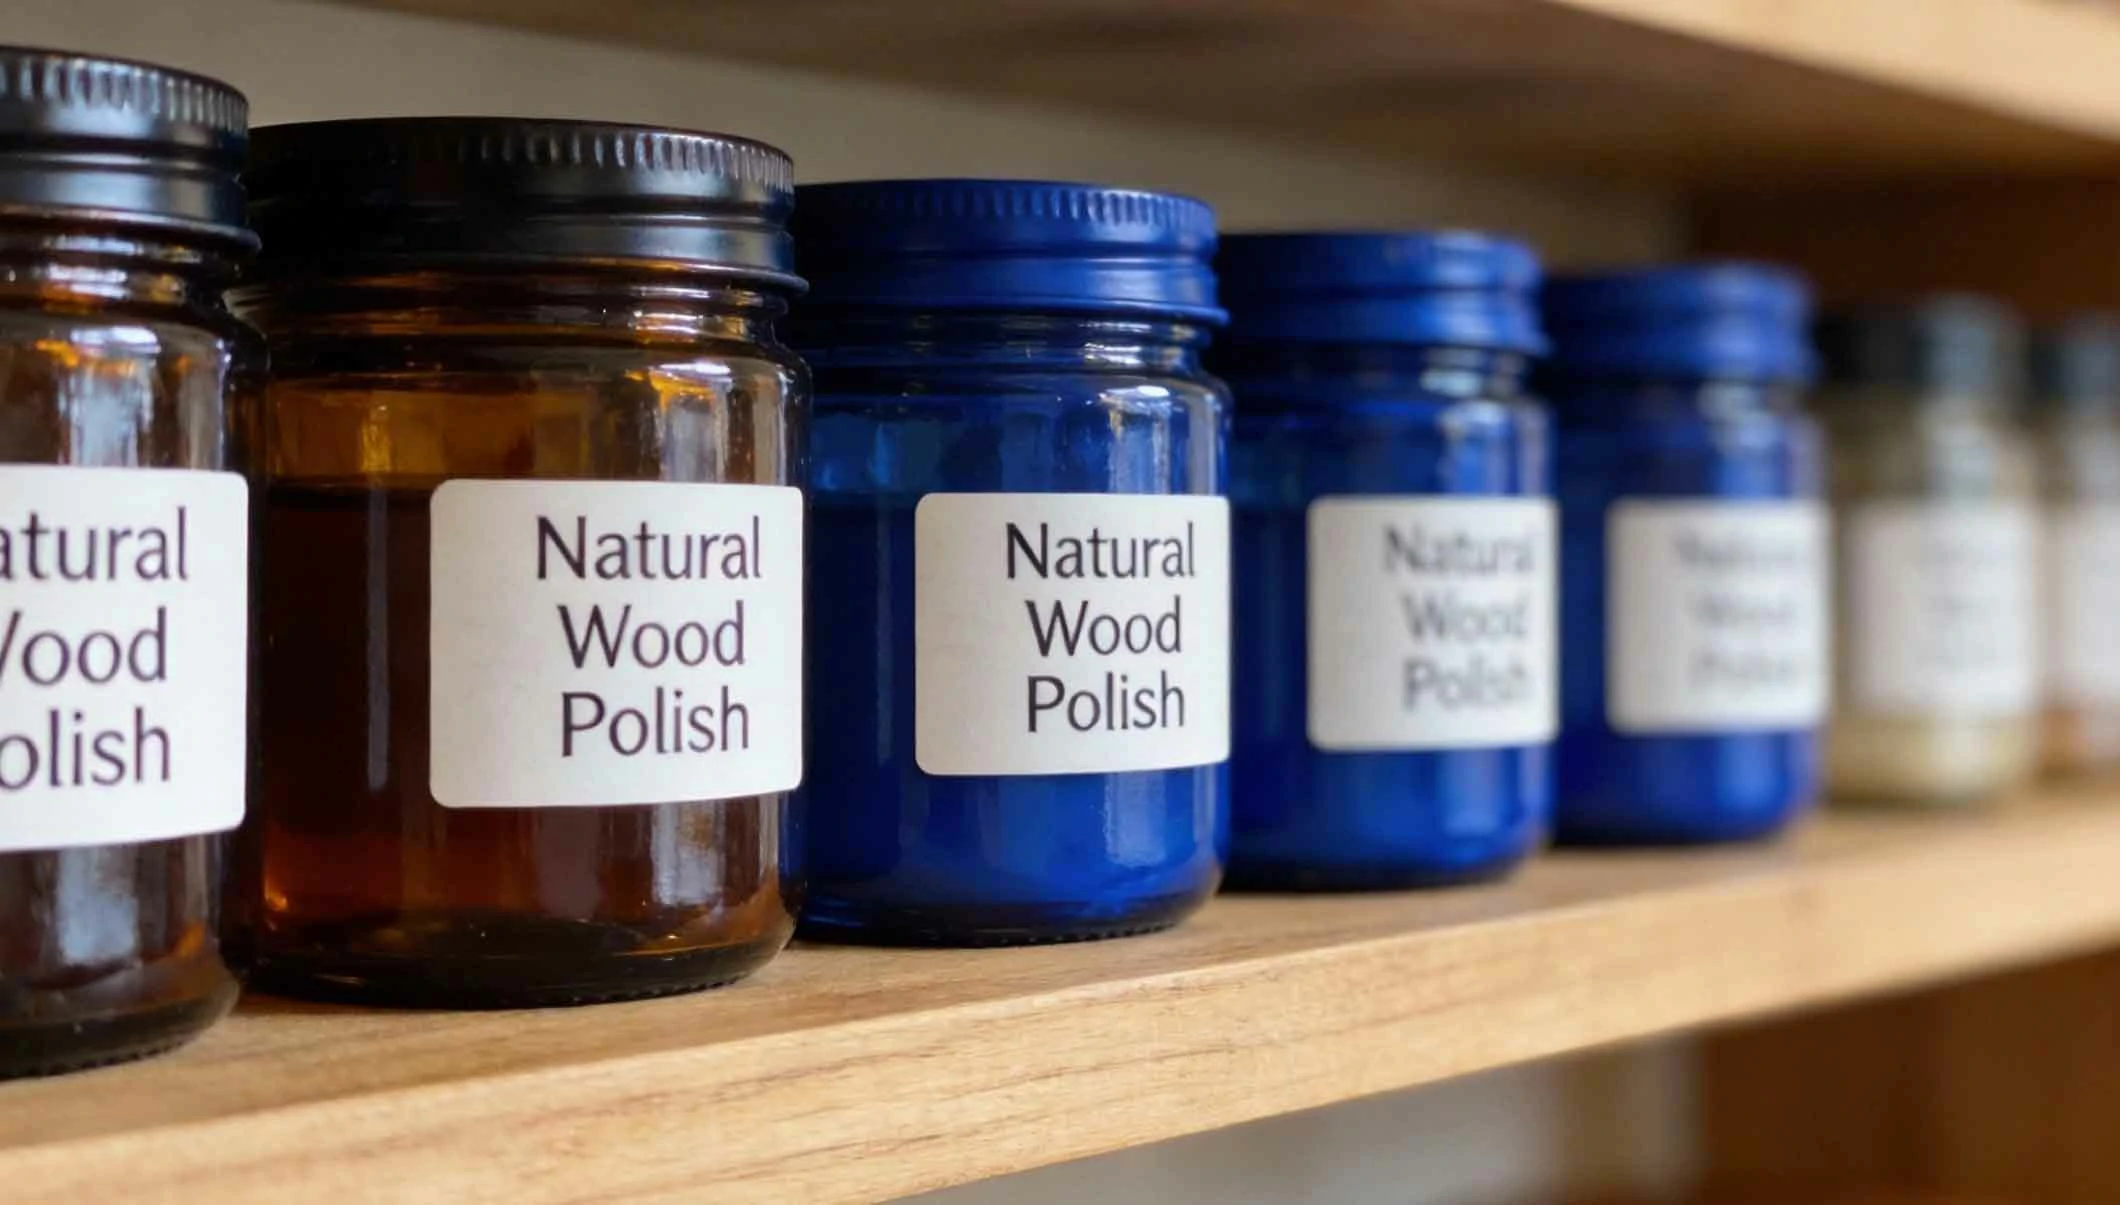
1. Choosing the Right Container
Always store your polish in a dark glass jar (like amber or cobalt blue) with a tight seal. Glass prevents chemical leaching, and the dark color protects the oils from light degradation.
2. Understanding Shelf Life
A polish made with fresh lemon juice will last 2-3 weeks in the refrigerator. Using vinegar or citric acid powder extends this to 2-3 months. If you smell anything rancid or sour, discard it immediately.
3. Crucial Safety and Testing Tips
• Always Test First: Apply to a hidden area (inside a leg, back of a drawer) and wait 24 hours.• Avoid Unfinished Wood: These polishes are for sealed or finished wood. For raw wood, use pure oil only.• Keep Away from Heat & Flame: Oils are flammable. Store and use away from open flames.• Fabric Warning: Oils can stain fabric. Buff thoroughly and be cautious on upholstered furniture arms.
♻️ Troubleshooting Common Wood Care Issues
Your DIY polish can also be part of the solution for specific wood furniture problems.
1. Addressing White Heat Rings or Water Marks
Create a thicker paste with equal parts olive oil and baking soda or salt. Gently rub the paste onto the mark with your finger, following the grain, for a minute. Wipe clean with a damp cloth, then dry and apply your regular polish.
2. Reviving Dull, Neglected Wood
For wood that has lost its luster, clean first with a 1:1 vinegar and water solution to strip old wax. Let it dry completely. Then, apply your DIY polish generously, let it soak for 20-30 minutes, and buff. You may need 2-3 applications over a week.
3. What NOT to Use Your DIY Polish On
Avoid using oil-based polishes on: painted furniture, whitewashed or limed finishes, antique furniture with a historical patina (consult a professional), or grand pianos and other high-value instruments (which require specialist products).
Advertisements
Advertisements
You May Have Missed
Put an onion under your feet while you sleep and see what happens

30+ Stunning And Successful Redheads Of Hollywood