PVC Pipe Creations: How to Make Birds, Animals & More
Advertisements
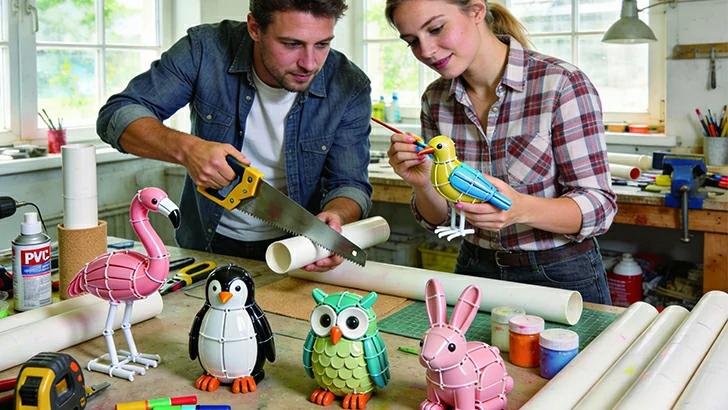
Unlocking the creative potential of ordinary materials is a rewarding endeavor, and few are as versatile and accessible as PVC pipe. Primarily associated with plumbing and irrigation, PVC (polyvinyl chloride) pipe is a durable, lightweight, and inexpensive material that can be transformed into a stunning array of decorative and functional art. From whimsical garden ornaments to playful indoor sculptures, creating birds, animals, and other figures from PVC pipe is an engaging project for crafters, educators, and DIY enthusiasts of all skill levels. This guide will walk you through the essential techniques and provide specific, step-by-step plans to bring your own PVC pipe menagerie to life.
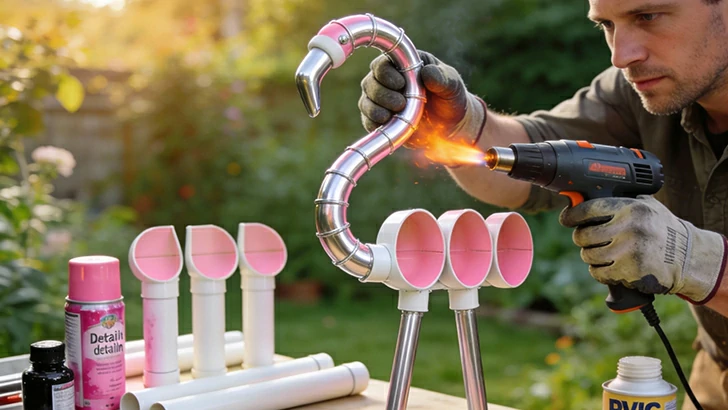
1. The Graceful PVC Flamingo
Add a touch of tropical elegance to your garden or patio with a life-sized flamingo sculpture. This project focuses on creating the bird's iconic curves using heat-forming techniques.
1. Materials and Tools Needed
You will need: 1-inch diameter PVC pipe (approximately 10 feet), PVC primer and cement, a heat gun, heavy-duty gloves, a hacksaw or PVC cutter, sandpaper, pink spray paint (outdoor grade), and black paint for details.
2. Forming the Body and Neck
Cut the pipe into sections: one 36-inch piece for the neck/body and four 18-inch pieces for the legs. Carefully use the heat gun to warm a section of the long pipe. Wearing gloves, gently bend the warmed pipe to create the S-curve of the neck and the rounded body shape. Allow it to cool completely to set the form.
3. Assembly and Finishing
For the legs, cut two of the 18-inch pieces in half lengthwise to create four half-rounds. Cement these to the bottom of the body as feather details. Attach the two remaining full pipes as the straight leg supports. Once assembled, sand all edges, apply primer, and spray with several coats of vibrant pink paint. Finally, paint a small black beak and eye.
Advertisements
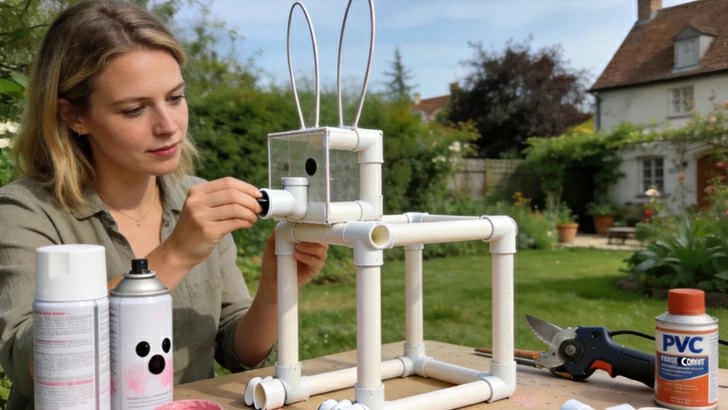
2. The Playful PVC Pipe Bunny
This charming bunny is perfect for Easter decorations or a year-round garden friend. Its simple geometric shapes make it an ideal beginner project.
1. Materials and Tools Needed
Gather: 1/2-inch diameter PVC pipe (about 6 feet), various PVC fittings (four tees, two elbows, four end caps), PVC cutter, PVC cement, white spray paint, pink paint for the inner ears, and a small piece of black felt.
2. Constructing the Frame
The body is a simple rectangle. Cut two long pieces for the top and bottom and four short pieces for the vertical sides, connecting them with tee fittings at the corners. The head is a cube made from shorter pieces and elbows. Attach the head to the body using a pipe segment inserted into a tee on the body and a tee on the head's base.
3. Adding Details
Create ears by cutting thin, tall ovals from the flat side of a larger diameter pipe or using PVC sheet. Attach them to the top of the head. For legs, use short pipe segments with end caps as feet. Paint the entire bunny white, add pink to the ear centers, and glue on small black felt circles for eyes and a nose.
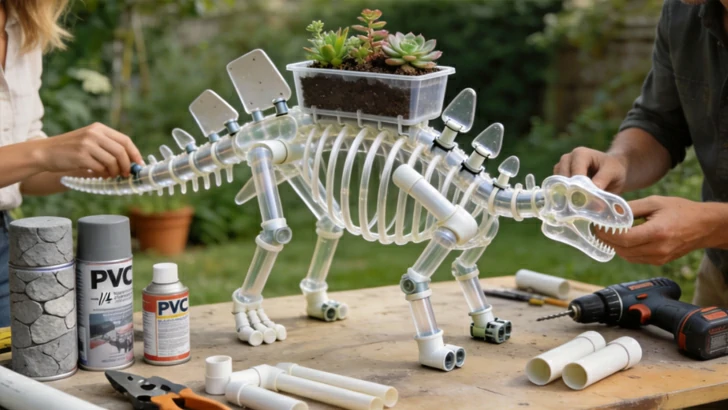
3. The Dinosaur Skeleton Planter
Combine paleontology with horticulture by creating a T-Rex or Stegosaurus skeleton that doubles as a succulent planter. This project uses joints and profiles to suggest bone structures.
1. Materials and Tools Needed
You will need: 3/4-inch and 1/2-inch PVC pipes, a variety of elbows, tees, and cross fittings, a PVC cutter, PVC cement, a drill, grey or stone-texture spray paint, a small plastic tray or container for the planter box, and potting soil with succulents.
2. Building the Spine and Ribcage
Start with the spine using the 3/4-inch pipe. Cut a long piece for the main spine and use tee fittings at regular intervals to attach smaller pipe pieces as ribs. For a Stegosaurus, use cross fittings on the spine to attach the famous back plates, which can be cut from the flat side of a larger pipe.
3. Final Assembly and Planting
Construct the legs, skull, and tail using smaller diameter pipes and fittings. The skull can be abstract, built from elbows and tees to form a simple boxy shape. Cement the planter box onto the dinosaur's back between the spines or ribs. Once fully assembled, paint the entire skeleton with a textured grey paint. Let dry, fill the planter with soil, and plant your succulents.
Advertisements
Advertisements
You May Have Missed

Man gives hitchhiker a lift home—and is shocked by the news the next day

30+ Stunning And Successful Redheads Of Hollywood