Trash Can to Rainwater Collector DIY (Under $30)
Advertisements
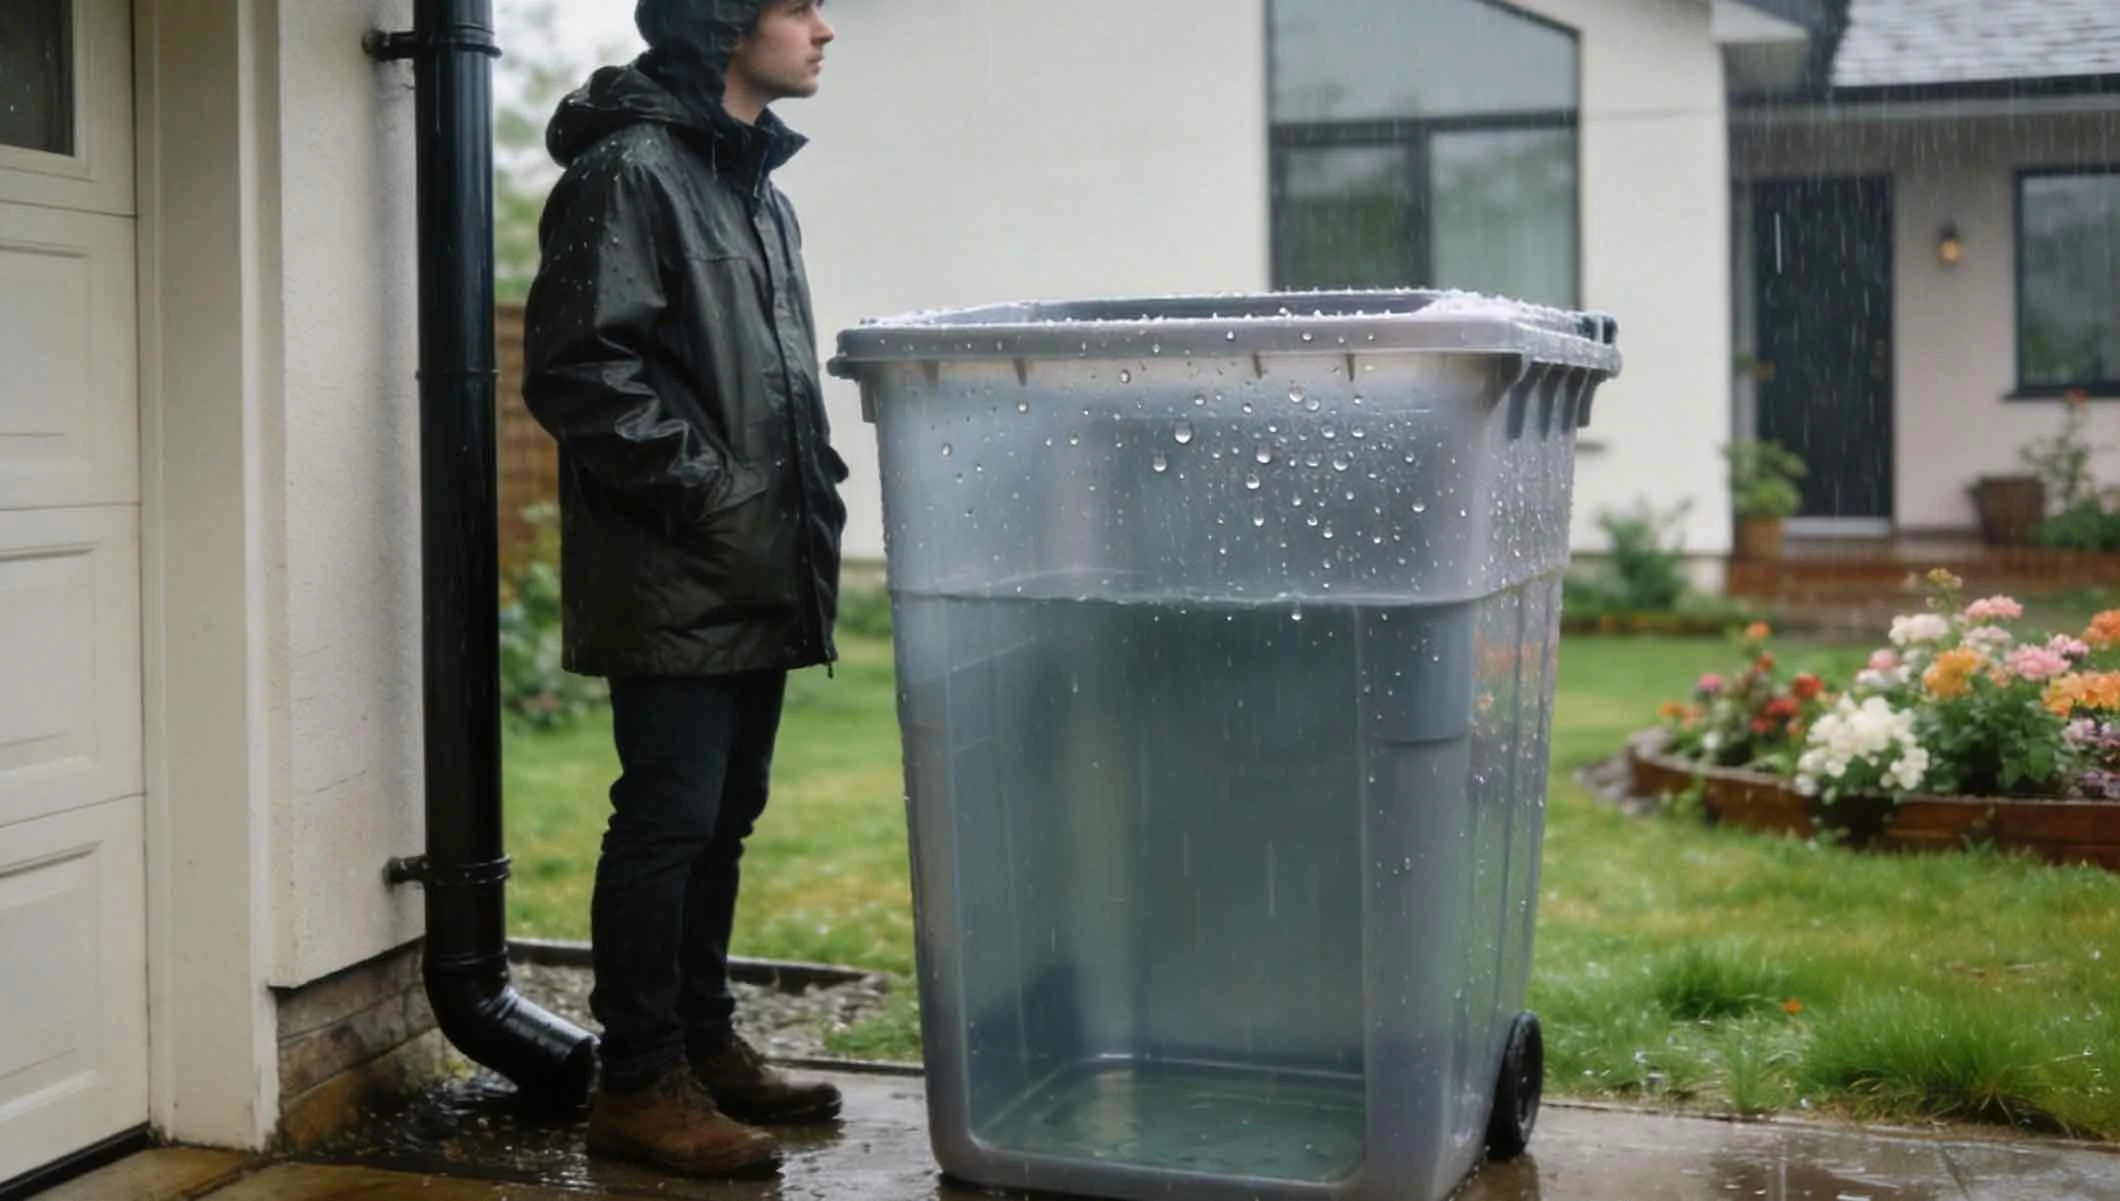
In an era of increasing environmental awareness and a desire for self-sufficiency, harvesting rainwater is a simple yet profoundly impactful practice. It reduces your dependence on municipal water systems, lowers your water bill, and provides excellent untreated water for your garden, lawn, or outdoor cleaning tasks. While commercial rain barrels can be expensive, a highly effective and affordable alternative is waiting at your local hardware store: a standard plastic trash can. This guide will walk you through transforming an ordinary trash can into a fully functional rainwater collection system for under $30, detailing every material, step, and consideration to ensure success.
1. The Core Vessel: Selecting and Preparing Your Trash Can 🛢️
The trash can is the heart of your system. Its selection and preparation are crucial for durability, safety, and functionality.
🔍 1. Material and Size
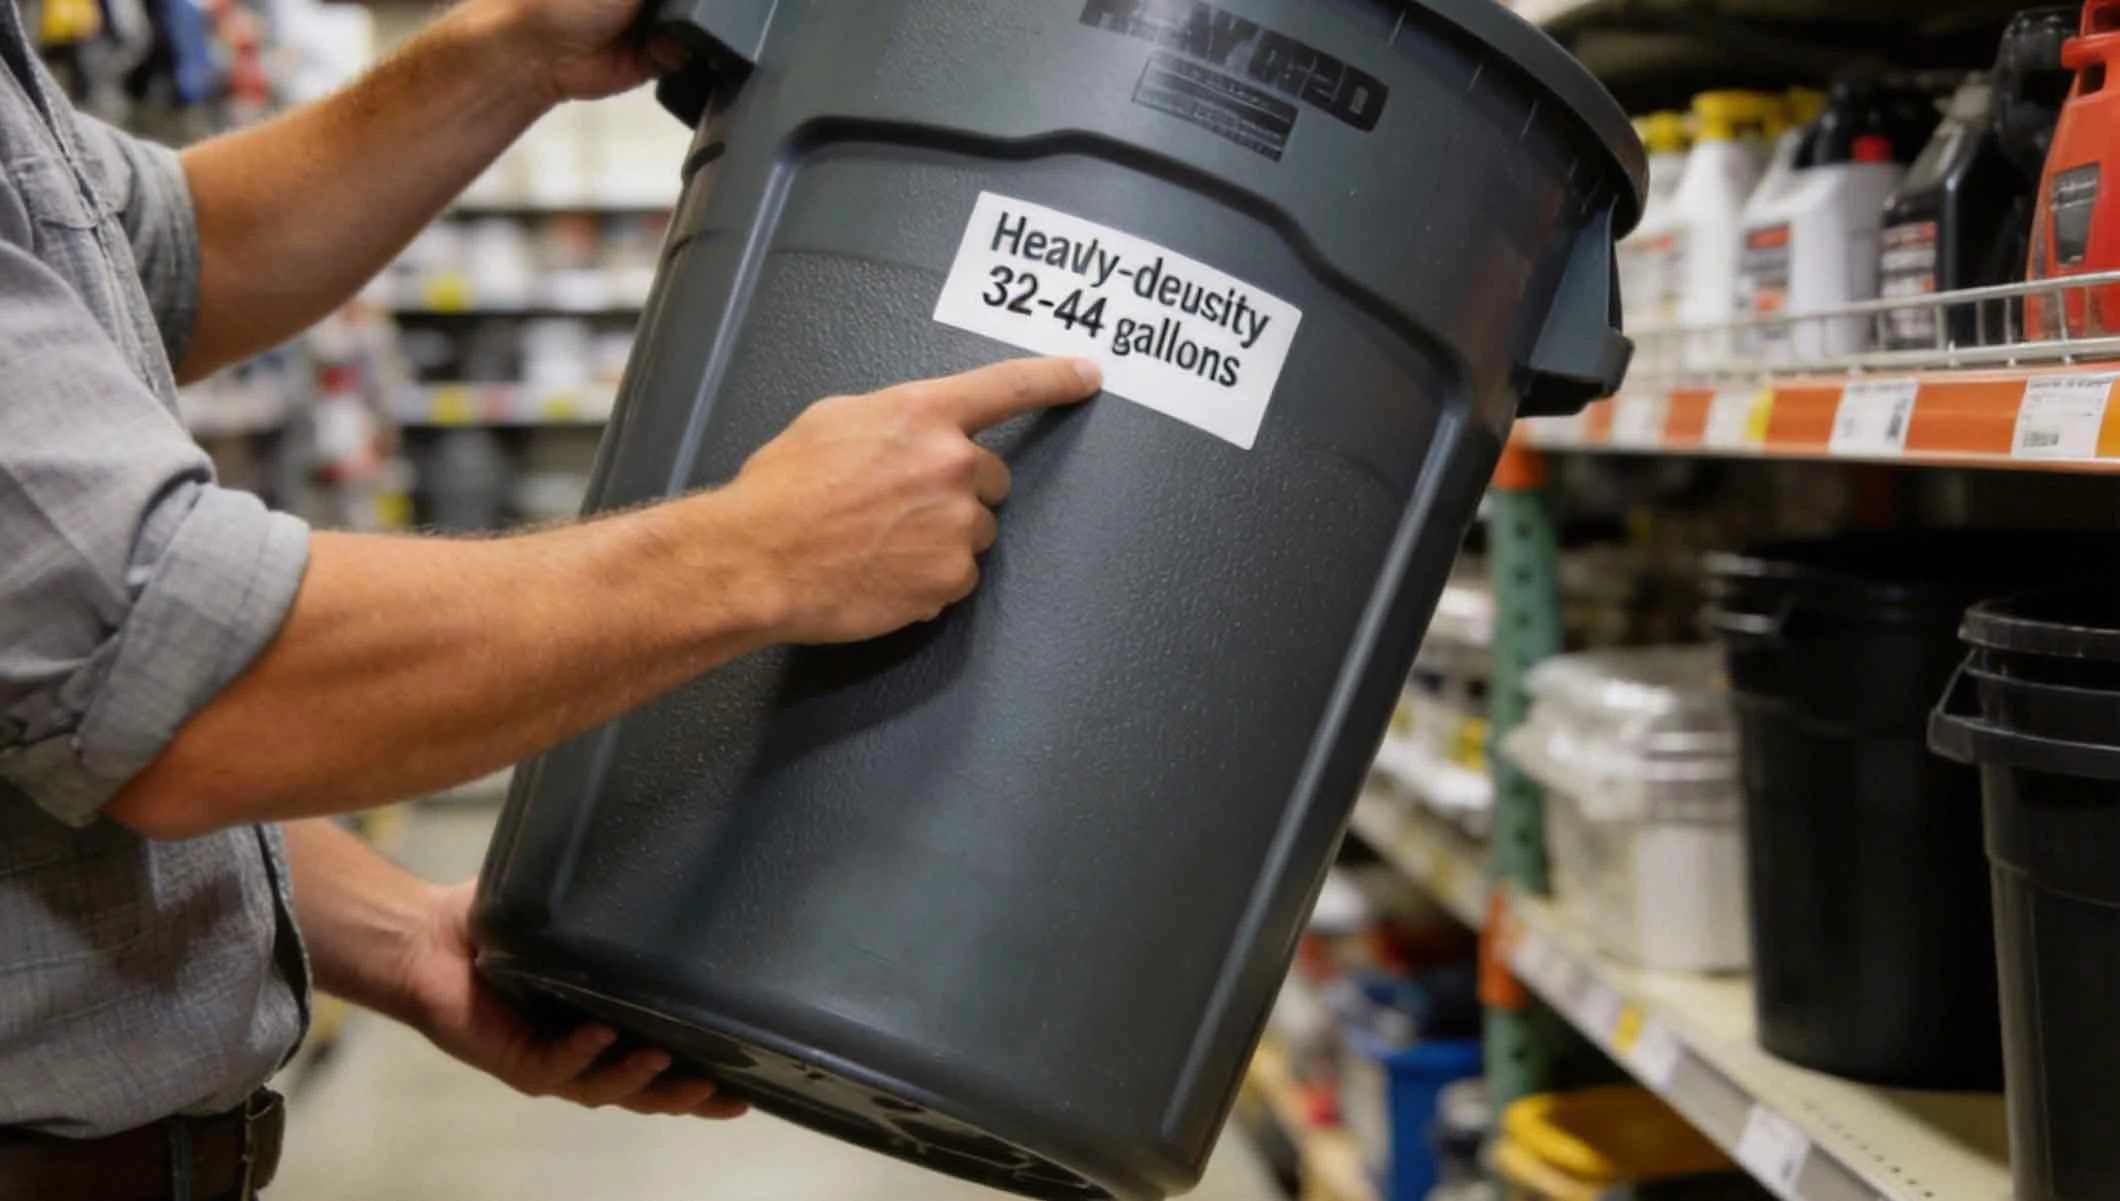
Choose a heavy-duty, food-grade plastic trash can with a capacity of 32 to 44 gallons (120-165 liters). A 32-gallon can is a manageable size for most. Ensure it is made of opaque, UV-resistant plastic to inhibit algae growth. Never use a can that previously held chemicals or non-food materials.
🧼 2. Cleaning
Thoroughly clean the new trash can with a mild soap and water solution. Rinse it multiple times to remove any manufacturing residues or dust. This initial cleaning is vital to ensure the water you collect is as pure as possible from the start.
📍 3. Location and Platform
Select a stable, level spot near a downspout. Before placing the can, build or place a sturdy platform (cinder blocks or pavers work well) at least 6-12 inches high. Elevating the barrel creates gravity pressure for easier water access and allows room to place a watering can underneath the spigot.
Advertisements
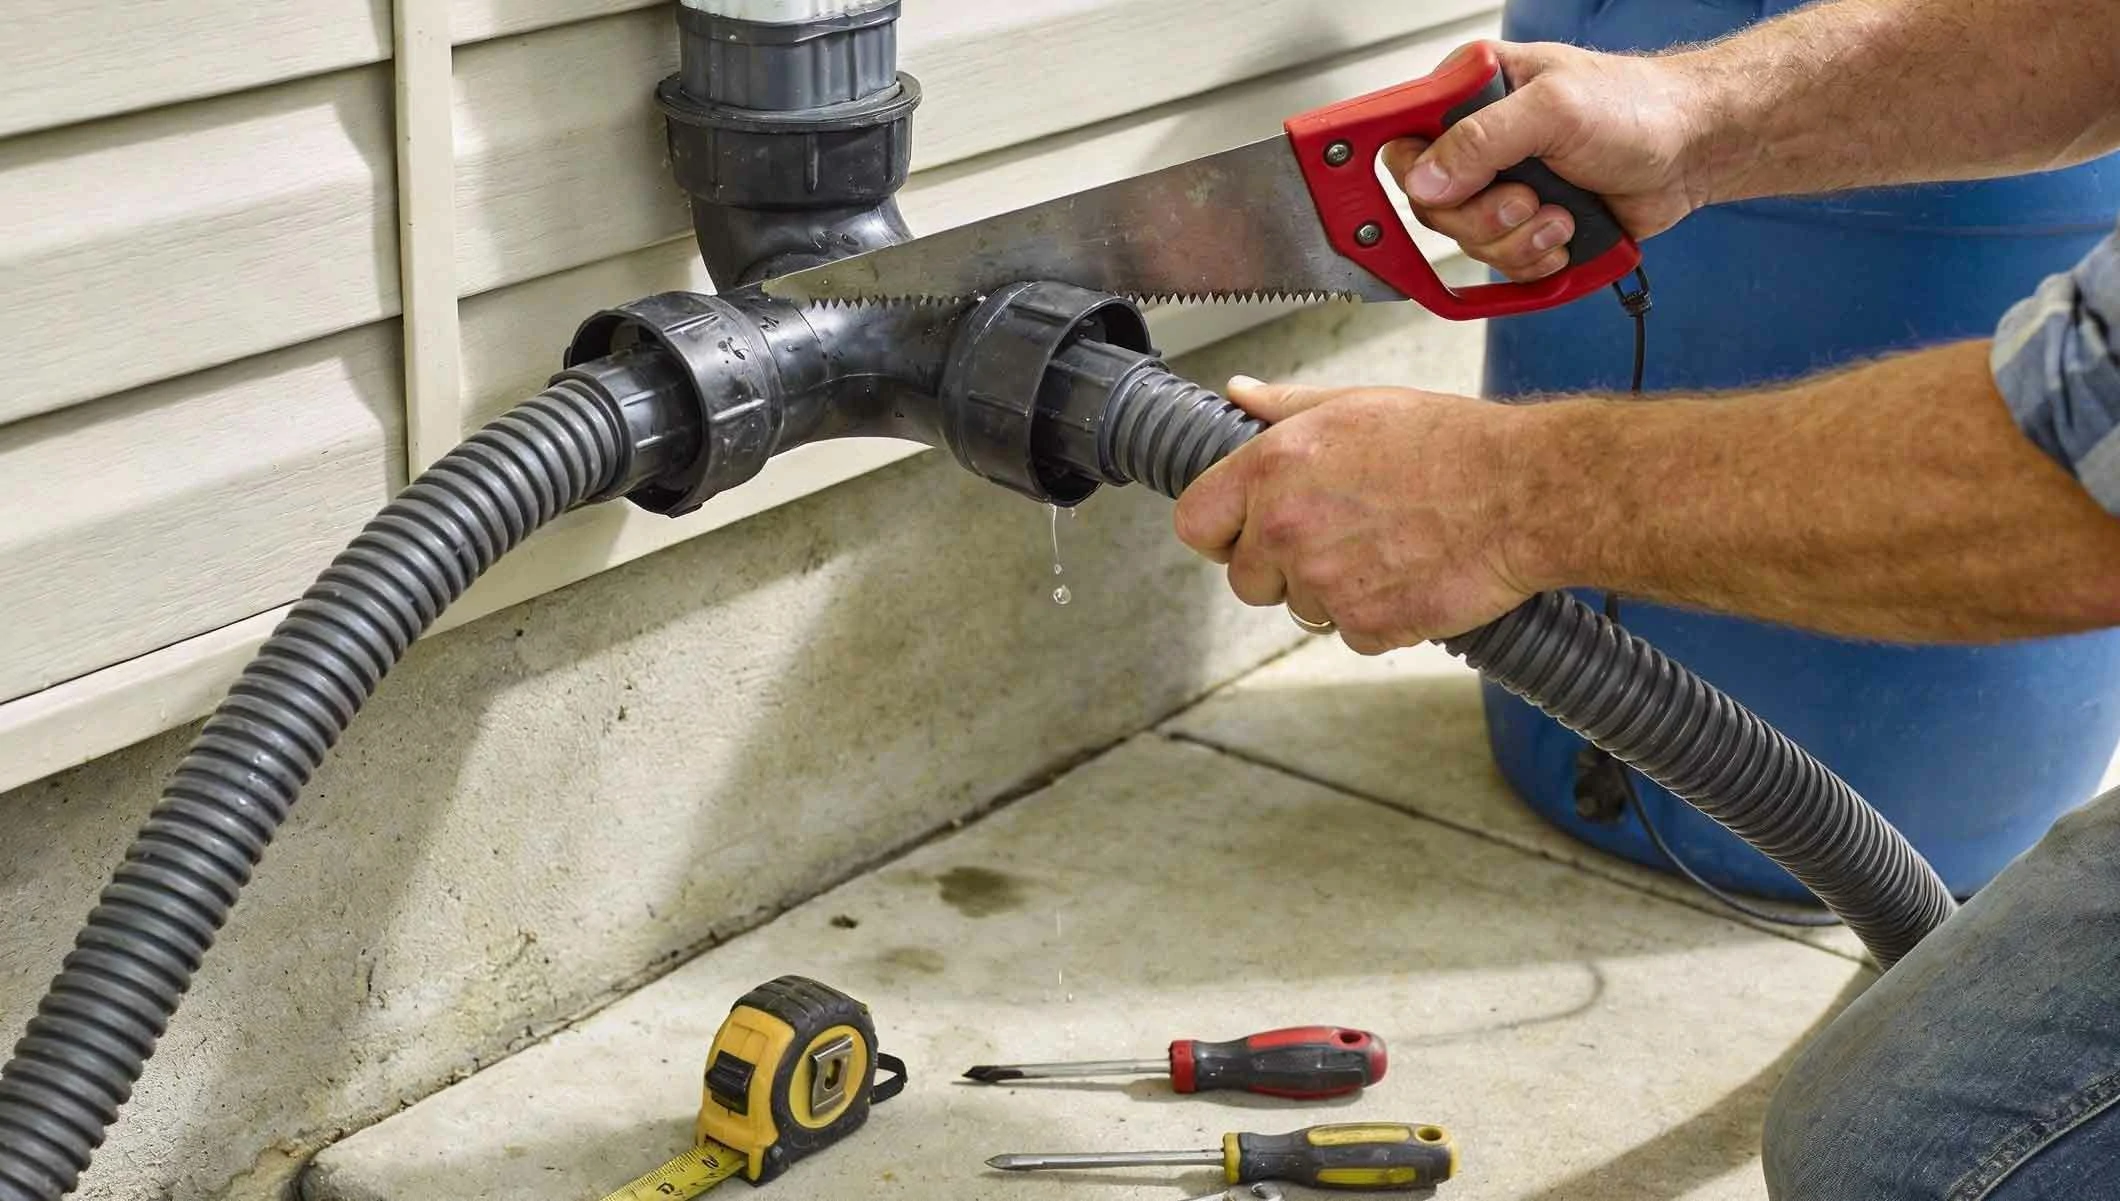
2. The Inlet System: Diverting Water from Your Downspout 🌧️
This component directs rainwater from your gutter downspout into your barrel efficiently while preventing debris and mosquitoes from entering.
✂️ 1. Downspout Diverter
The simplest method is to use a flexible downspout extension or a specifically designed rain barrel diverter kit. Cut your existing downspout at a height slightly above the top of your elevated barrel. Attach the diverter to channel water into the barrel.
🕳️ 2. Creating the Lid Inlet
Using a hole saw attachment on your drill, cut a hole in the trash can lid slightly smaller than the diameter of your diverter hose or downspout extension. The goal is a tight fit to minimize gaps.
🦟 3. Installing a Debris Screen
Place a fine mesh screen (like fiberglass window screening) over the inlet hole inside the lid or use a prefabricated basket filter. Secure it with a plastic zip tie or by snapping the lid's rim over it. This screen is essential for filtering out leaves, twigs, and insects.
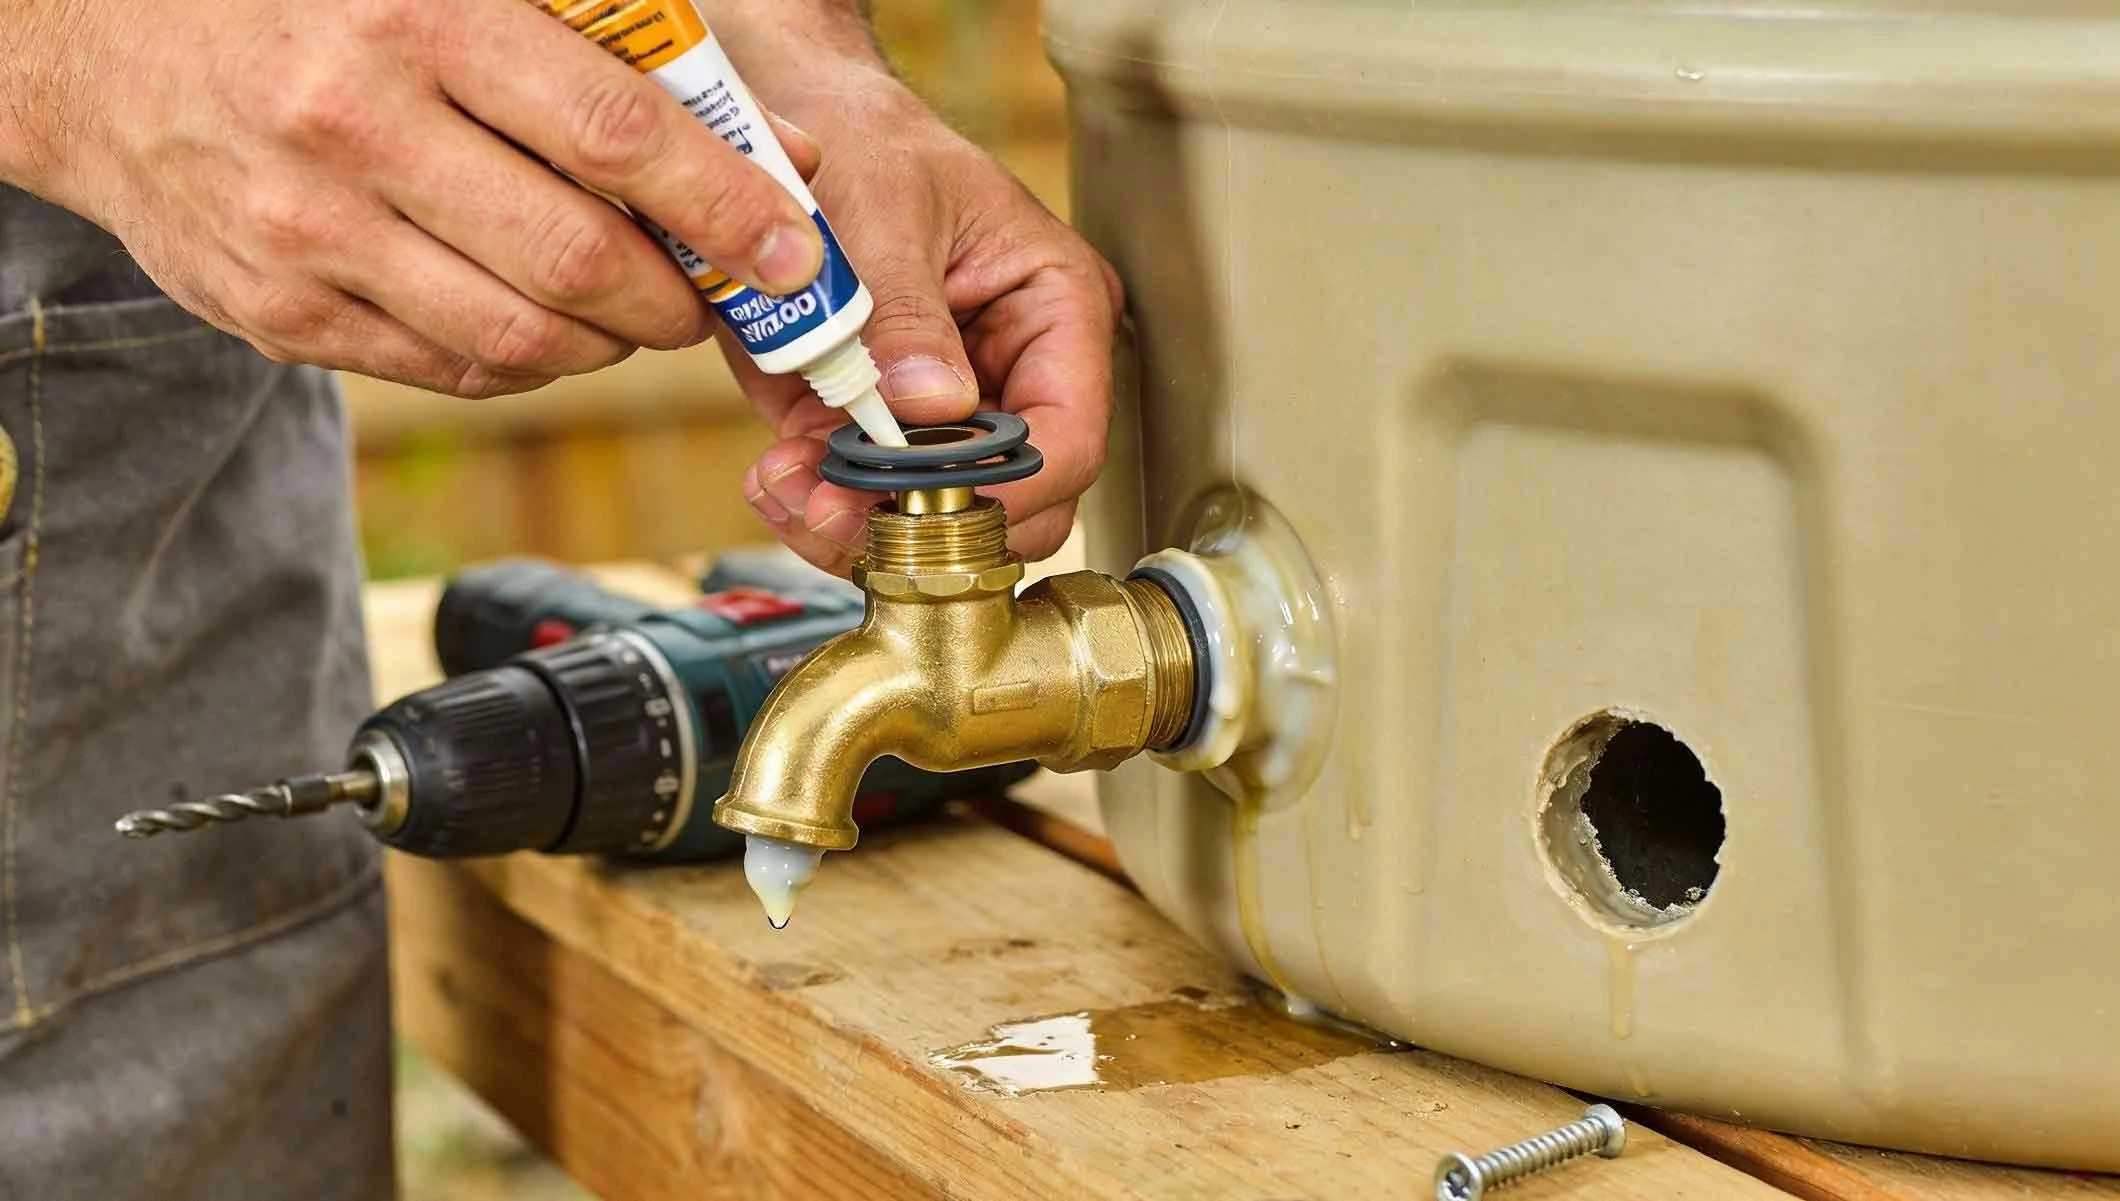
3. The Outlet System: Installing the Drainage Spigot 🚰
The spigot is your point of access for the collected water. A proper, leak-proof installation is non-negotiable.
📏 1. Determining Spigot Height
Mark the spot for the spigot 2-4 inches from the bottom of the trash can. Placing it too low will allow sediment to be drawn out; placing it higher leaves unusable water in the bottom.
🔧 2. Drilling the Hole
Using a drill bit matched to the size of your spigot's threaded shank (typically 3/4 inch), carefully drill a clean hole at the marked spot. Deburr any rough plastic edges from the hole.
🔩 3. Sealing and Attaching the Spigot
Apply a generous bead of 100% silicone sealant or use rubber washers on both the inside and outside of the hole. Insert the spigot's threaded end from the outside, screw on the retaining nut from the inside, and tighten firmly with a wrench. Allow the sealant to cure completely (check product instructions) before filling with water.
Advertisements
Advertisements
You May Have Missed

The 10 riskiest dog breeds to keep at home

40 Breathtakingly Perfect Time-Lapse Photos