Upcycled Project: Faux Planter Trash Can & Stool Makeover
Advertisements
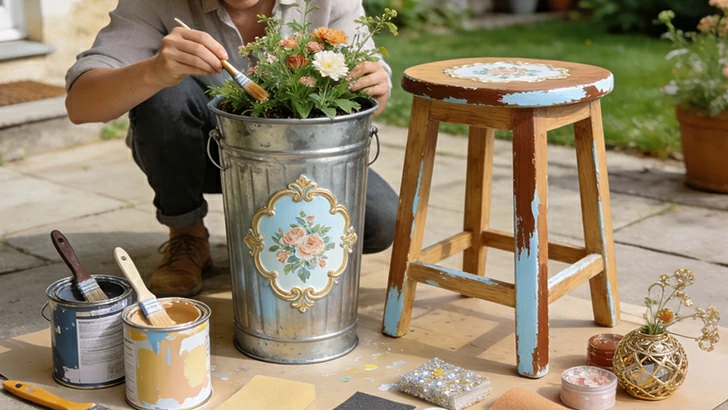
In the world of DIY and sustainable living, upcycling stands out as a creative and impactful practice. It's more than just recycling; it's the art of transforming discarded or mundane objects into items of greater value, beauty, and function. This project focuses on a delightful duo: a humble metal trash can and a simple wooden stool. Instead of relegating them to the landfill or the back of the garage, we will breathe new life into them, converting the trash can into a charming faux planter and giving the stool a complementary makeover. The result? A unique, eco-friendly decorative set that adds a touch of rustic or modern flair to any patio, porch, or sunroom. This guide will walk you through every step, from material selection to the final decorative touches, proving that with a bit of imagination and effort, anything can have a beautiful second act.
1. Sourcing and Preparing Your Materials
The success of any upcycling project begins with thoughtful preparation. The goal is to find a solid base and gather all necessary supplies to ensure a smooth, enjoyable process. This stage is crucial for setting the foundation for a durable and aesthetically pleasing finish.
1. Finding the Perfect Base Objects
Scour thrift stores, garage sales, online marketplaces, or even your own storage for the right items. For the faux planter, look for a metal trash can with a simple cylindrical shape, preferably without dents or severe rust. A standard 10-15 gallon size works well. For the stool, a sturdy three- or four-legged wooden stool is ideal. Ensure it is structurally sound—wobbly legs can be tightened, but avoid wood that is rotten or split.
2. Essential Tools and Supplies
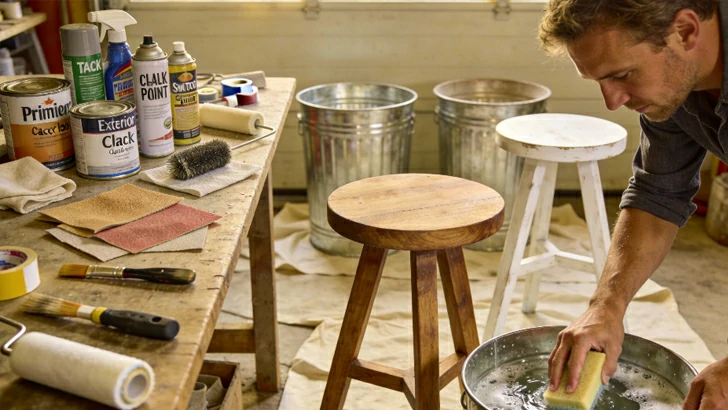
Gather the following: coarse and fine-grit sandpaper, a wire brush (for rust), a tack cloth, a high-quality primer suitable for metal and wood, exterior-grade spray paint or chalk-style paint in your chosen colors, clear outdoor-rated sealant (matte or satin), painter's tape, and drop cloths. You will also need a paintbrush or small roller if using liquid paint.
3. The Critical Cleaning and Sanding Phase
Thoroughly clean both items with warm, soapy water to remove grime and grease. For the metal can, use the wire brush to scrub off any loose rust. Rinse and dry completely. Sand all surfaces—the entire trash can and all parts of the stool—with coarse-grit sandpaper to create a "tooth" for the primer to adhere to. Wipe away all dust with a tack cloth. This step cannot be rushed, as proper adhesion is key to a long-lasting finish.
Advertisements
2. The Faux Planter Trash Can Transformation
This is the centerpiece of the project. We are transforming a functional object into a purely decorative one, mimicking the look of a classic terracotta or stone planter. The focus here is on achieving a realistic, textured finish that belies the object's original purpose.
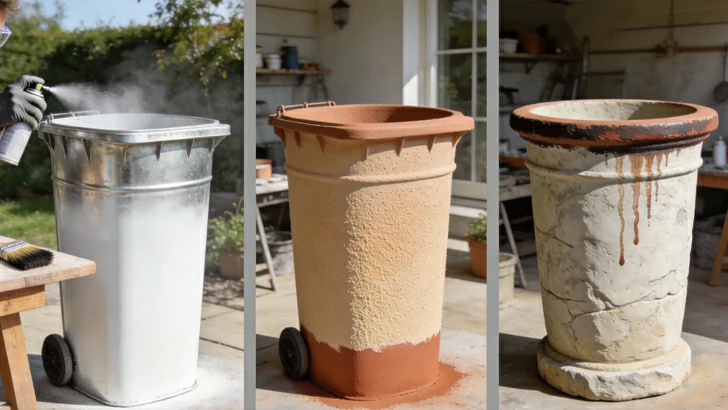
1. Applying Primer for Maximum Adhesion
In a well-ventilated area, apply a uniform coat of primer to the entire exterior of the clean, sanded trash can. A spray primer designed for metal and multi-surfaces works efficiently. Ensure you cover every inch, including the rim and bottom lip. Allow the primer to dry completely according to the manufacturer's instructions. This layer prevents rust and provides a perfect base for your topcoat.
2. Creating the Base Coat and Texture
Choose a base color that resembles classic pottery, such as terracotta, stone gray, or a soft white. Apply the first coat of paint evenly. For a more authentic, textured planter look, consider techniques like sponge painting or using a stiff-bristled brush to create subtle streaks before the paint dries. You can even mix a small amount of fine sand into the paint for a gritty texture. Let this coat dry thoroughly.
3. Adding Realistic Weathering and Details
To elevate the "faux" effect, add weathering details. Lightly dry-brush a darker shade around the rim and base to mimic dirt and shadow. Use a small brush to add subtle "water stain" streaks from the rim downward. The key is to build these effects in thin, translucent layers, stepping back frequently to assess the realism. Remember, real planters age unevenly, so embrace imperfections.
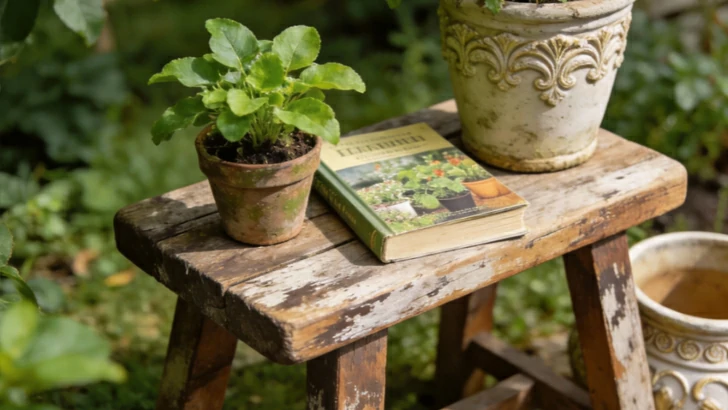
3. The Complementary Stool Makeover
The stool serves as a perfect sidekick to the planter, offering a surface to display smaller potted plants, a spot to rest a gardening book, or simply as a standalone decorative element. Its makeover should complement, not necessarily match exactly, the style of the planter.
1. Structural Repair and Wood Preparation
Before any painting, address the stool's structure. Tighten all screws and joints. If the wood is rough, sand it smoothly, paying extra attention to the seat and leg edges. Fill any deep cracks or holes with wood filler, sand smooth once dry, and wipe clean with a tack cloth. A solid base ensures the finished product is both beautiful and functional.
2. Choosing a Complementary Color Scheme
Your color choice ties the set together. You could paint the stool the same color as the planter's base for a uniform look, or choose a contrasting accent color found in your garden or patio décor. For a distressed, cottage-core style, consider using chalk paint followed by a light sanding on edges to reveal glimpses of the wood or a basecoat color underneath.
3. Painting Techniques for a Professional Finish
Apply primer to the stool if you are using a light color or painting over dark wood. Then, apply your chosen paint with a brush or small roller, following the wood grain. Multiple thin coats are better than one thick, drippy coat. For a complex finish, try techniques like color blocking on the seat and legs, or use stencils to add a simple floral or geometric pattern on the seat.
Advertisements
Advertisements
You May Have Missed

The waitress wrote a letter to her father without her mother's knowledge

40 Breathtakingly Perfect Time-Lapse Photos