The Art of Adhesion: Using Hot Glue as a Medium
Advertisements
This is the core technique that differentiates this method. Hot glue acts as a fantastically clear, quick-setting adhesive and encasement. The goal is to encapsulate the flowers without burning them or creating unsightly bubbles and strings.
1. 🔥 Prepping the Glue Gun
Plug in your glue gun and allow it to fully heat up. If using a low-temp gun, wait for the glue to become fully molten and transparent. Work on a clean, protected surface. Have a damp cloth nearby to quickly wipe any accidental glue drips from the pull's surface before it sets.
2. 🍯 Applying the First Anchor Layer
Apply a very small dot of hot glue to the back of your central or largest pressed flower. Using tweezers, immediately place it onto the pull base according to your design photo. Hold it gently for a few seconds until the glue sets. Repeat this process, building your arrangement from the bottom layer up (e.g., leaves first, then larger flowers, then tiny accents).
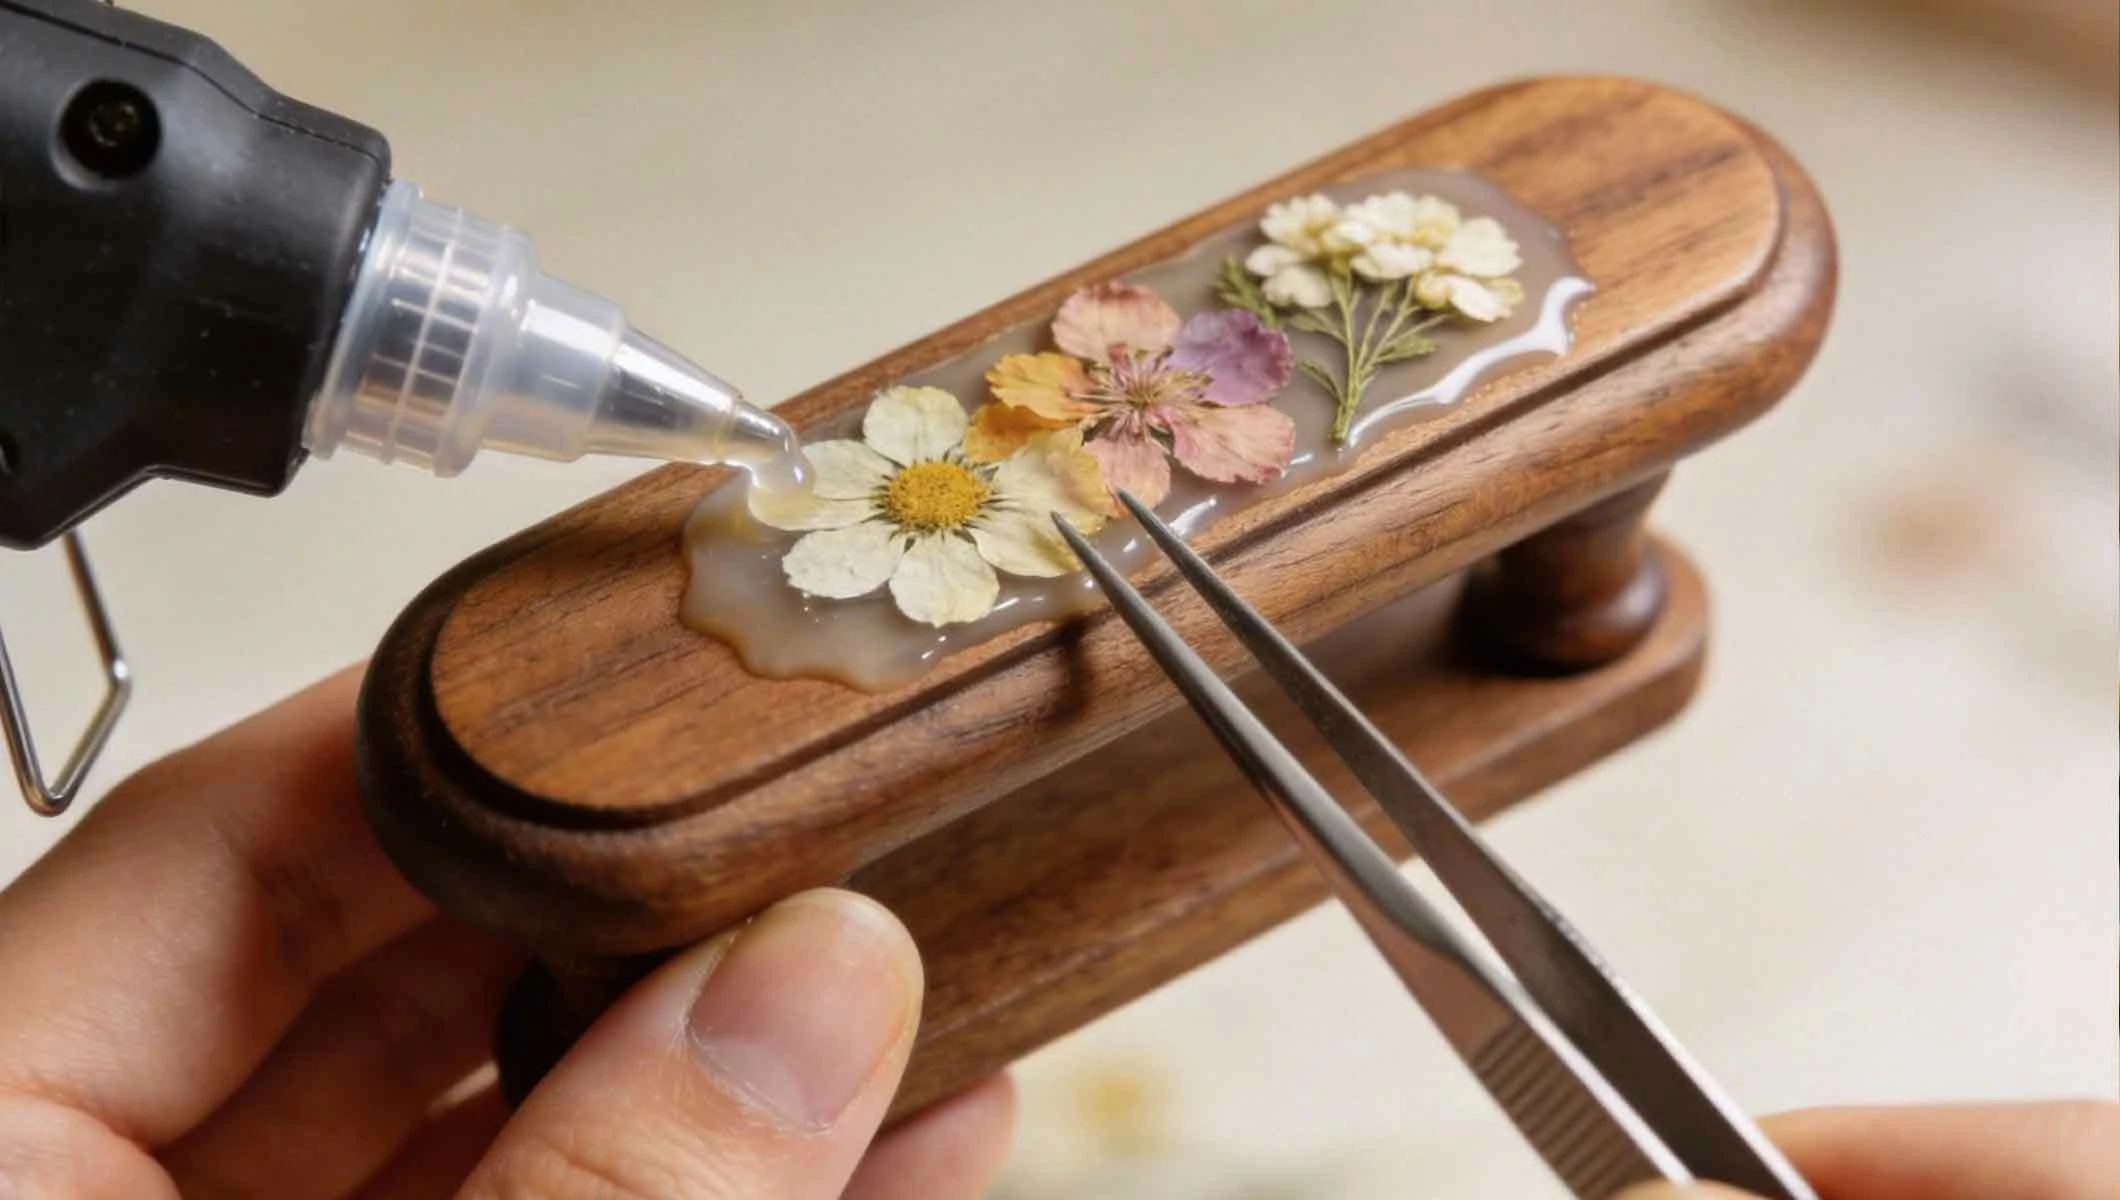
3. 🌊 Creating the Protective Dome
Once all elements are securely anchored, it's time to create the clear, glass-like dome. Slowly and steadily, apply a generous bead of hot glue around the outer edge of your floral arrangement. Then, carefully fill in the center, allowing the glue to flow naturally over the flowers. The goal is to completely submerge them in a smooth, convex layer of glue. Avoid going over the same spot repeatedly, as this can introduce air bubbles.
4. 💨 Managing Bubbles and Strings
If small air bubbles appear, you can often pop them with the tip of a pin or the hot nozzle of the glue gun immediately after application. To manage glue strings, make sure your sealing pass is confident and continuous. After finishing, quickly pass a heat source (like the glue gun nozzle held *near*, not touching) over the surface; the residual heat will melt away fine strings.
Finishing, Sealing, and Installation
The final steps ensure longevity and a professional finish. Proper sealing protects your work from moisture, oils from hands, and UV light, which can cause fading over time.
1. 🛡️ Applying a Final Sealant
After the hot glue has cooled and hardened completely (at least one hour), apply a clear, waterproof sealant. A spray acrylic sealant is efficient and provides an even coat. Apply 2-3 light, misting coats according to the can's directions, allowing full drying time between each. This layer will also help blend the surface to a uniform shine.
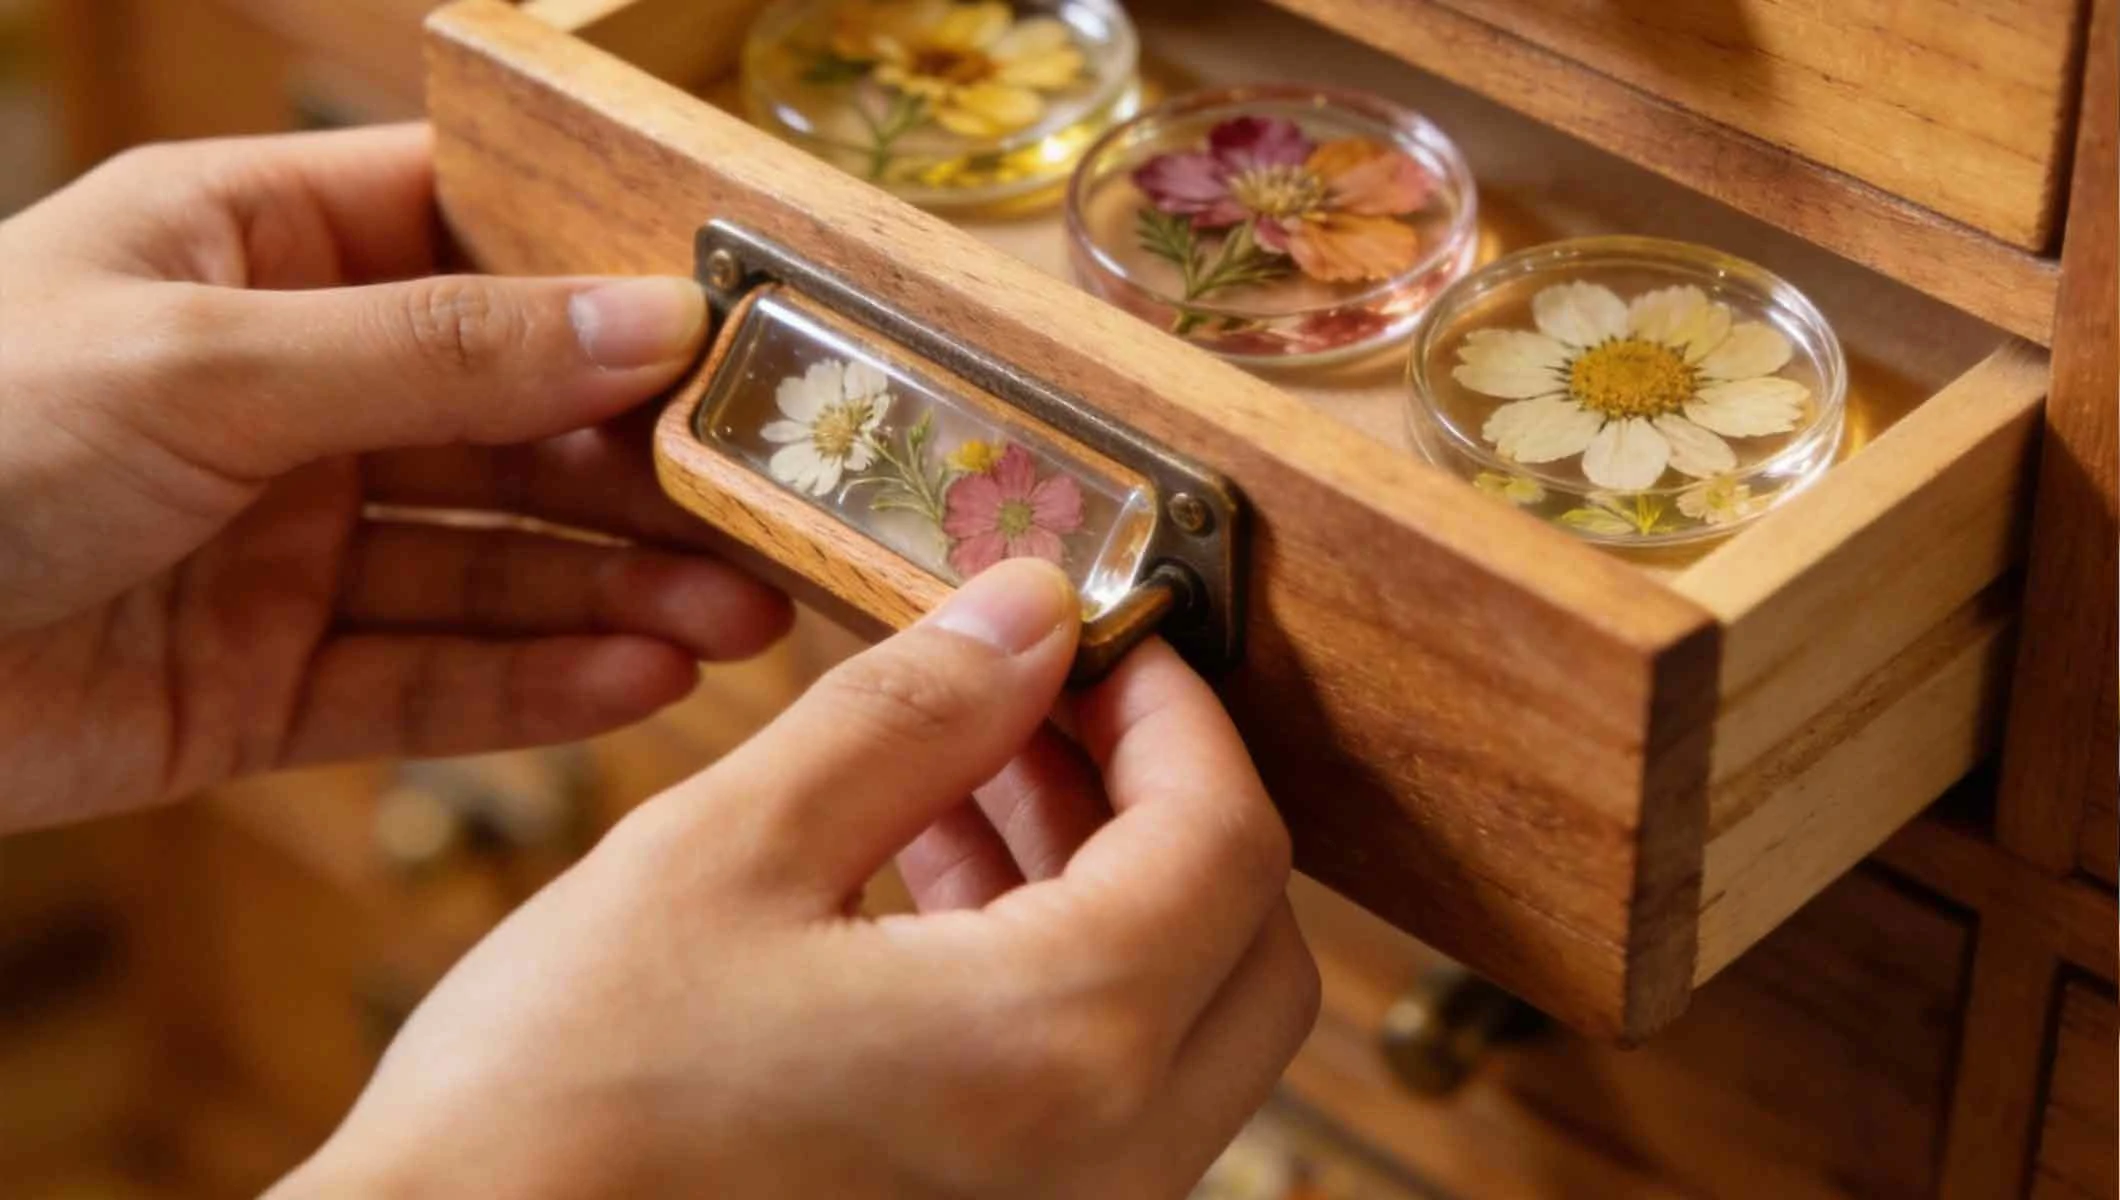
2. ⚙️ Attaching the Hardware
Most drawer pulls are attached with a bolt that passes through a hole in the furniture and screws into the back of the pull. Insert the bolt through the drawer front, then thread on your custom flower pull. Tighten securely using a screwdriver from the inside of the drawer. If your pull uses a different mechanism, follow its standard installation method.
3. ✨ Care and Maintenance
Clean your floral drawer pulls gently with a soft, dry cloth. Avoid using harsh chemicals, abrasive cleaners, or soaking them in water. While the sealant provides protection, treat them as decorative pieces—the longevity of the pressed flowers is best preserved with gentle handling.
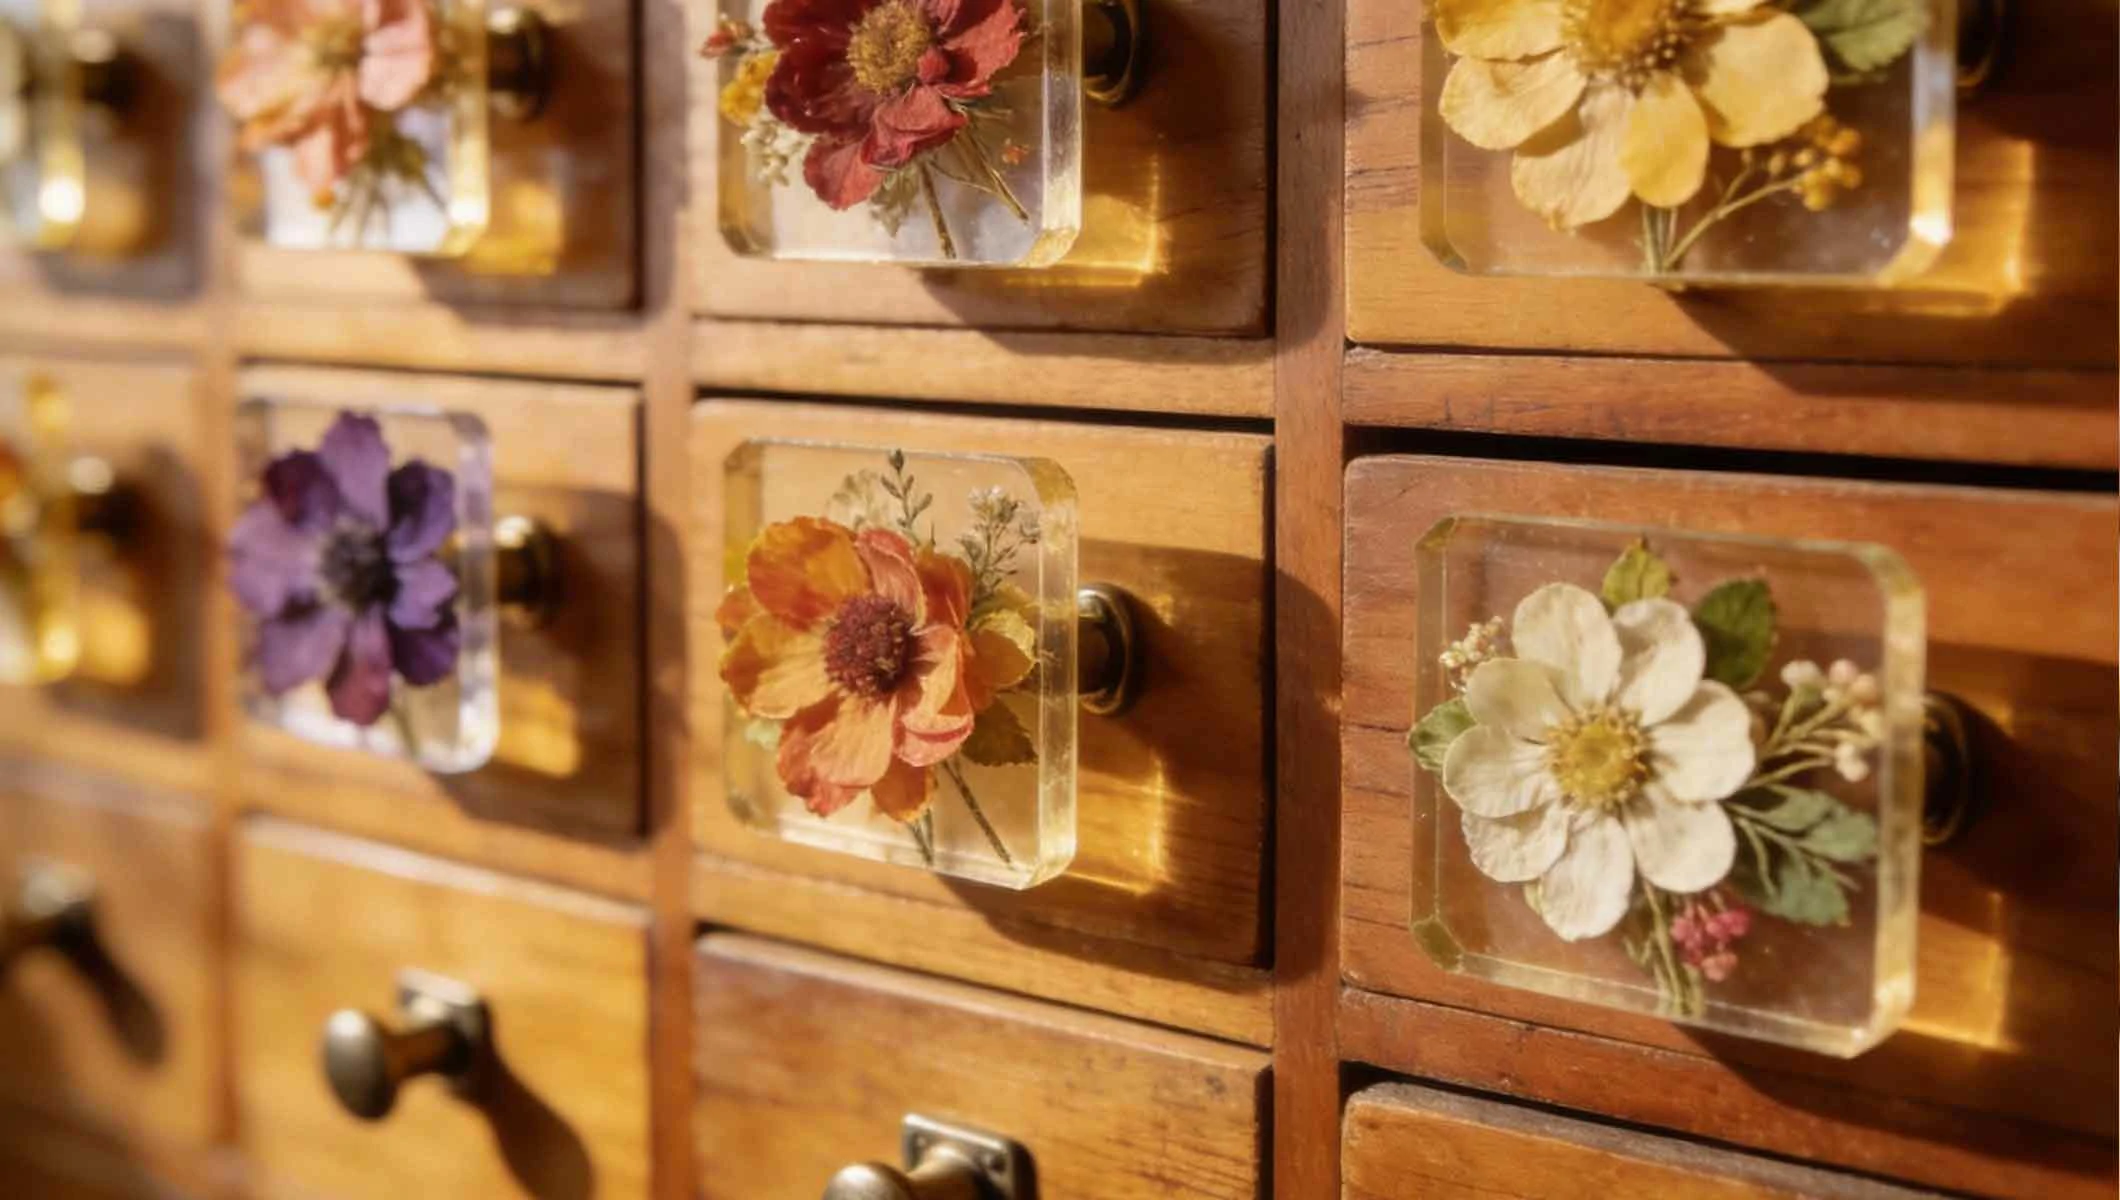
Conclusion: A Blooming Success
Creating DIY flower press drawer pulls with hot glue is more than a craft; it's a way to capture a season, a memory, or a favorite garden bloom and integrate it into your daily life. This project demonstrates that with simple materials and a bit of creativity, you can produce functional art that adds immense character and personal significance to your home. The technique of using hot glue as an encasing medium is forgiving and fast, making it perfect for crafters of all levels. So gather your favorite flowers, fire up your glue gun, and transform your furniture into a testament to nature's delicate, preserved beauty. Each time you open a drawer, you'll be greeted by a timeless, miniature garden of your own making.
Advertisements
Advertisements
You May Have Missed

29 shameless photos of Dubai that will amaze you

The husband abandoned his sick wife for his mistress.